** When you buy products through the links on our site, we may earn a commission that supports NRA's mission to protect, preserve and defend the Second Amendment. **

Today's factory bolt guns offer more than enough accuracy for most hunting and casual target applications. There are still, however, many occasions when better grouping is desired. For example, the level of competition in the high power rifle and metallic silhouette games is so high that even a half-minute-of-angle rifle is only average. And in some shooting sports, such as benchrest competition, rifles that can put five shots into 0.200-inch or less at 100 yards are commonplace.
Sometimes this degree of accuracy is obtained through the use of a precisely machined custom action. Such actions are quite expensive and are prohibited in certain forms of competition. An alternative is to build a gun using a blueprinted factory action—an action that has been re-machined to bring critical surfaces into perfect alignment.
 Such actions are capable of delivering impressive accuracy. Many years ago, I cobbled together an entry-level benchrest rifle in 6mm PPC based on a blueprinted Remington XP-100 action. To finish the project, I used cut-rifled barrel, a 2-oz. Hart trigger and an all-aluminum stock from Australia made by God knows who. The gun was topped by a 20x Lyman scope. The first group fired through the gun—on a cold January day—was a disappointing 0.403-inch, but I guess I just hadn't gotten my shooting technique down yet, for my next four groups measured 0.275-, 0.254-, 0.201- and 0.226-inch. Later that winter, the gun fired a 0.149-inch group in a sanctioned benchrest match.
Blueprinting (also called trueing) can also be a cost-effective way to begin competing at precision long-range matches with a rifle you probably already have in your gun safe.
For maximum accuracy, a barreled action should have a receiver with a bolt hole that is dead straight and centered in the receiver body. The axis of this hole becomes the reference axis with which the chamber, bore and barrel threads are perfectly aligned and to which the barrel shoulder, receiver face, locking lug seats, bolt lugs and breechface should be exactly perpendicular.
 The purpose of all this is to increase the consistency and repeatability of the movement and vibration that occur when a modern high-intensity cartridge is fired. Some vibration is inevitable. For maximum accuracy, the bullet should exit the barrel at the same point in the vibration pattern. Misaligned barrel threads, bolt lugs that seat only on one side, a barrel shoulder that is not square to the receiver face and so on will cause unpredictable stresses and vibrations, preventing the consistency in bullet exit needed for one-hole accuracy. Blueprinting reduces the shot-to-shot variation in the motion and vibration of the barreled action and thus enhances accuracy.
There's not any special magic to blueprinting a stock factory action—just careful attention to certain basic accurizing steps, which is what this article is all about. We'll be discussing Remington actions here because they are most often preferred by custom riflemakers; however, the basic accurizing steps can be applied to any turnbolt action.
Disassembly of the action and bolt
The first step in accurizing any bolt-action is to fully disassemble the action and bolt. A Kleinendorst Remington Bolt Disassembly Tool ($36 from Brownells) eases the task of removing the bolt shroud, firing pin and firing pin spring from the bolt body. When everything is apart, it's a good idea to degrease the components and inspect them for defects.
 Next is the removal of the barrel. Most factory barrels are screwed on pretty tight, so a hefty barrel vise and action wrench are needed—Brownells or MidwayUSA are a good source for both. Applying a few drops of Kroil penetrating oil ($14 from Brownells) the night before you attempt to remove the barrel makes the job a lot easier. Be especially careful not to spring the action when applying force with the action wrench.
Once the barrel is off, there are a few paths one can go down to mount the receiver in the lathe so that all subsequent machining operations are true in relation to the reference axis—the centerline of the bolt hole. Another way of saying this is the receiver should be mounted in the lathe so that the centerline of the bolt hole perfectly coincides with the axis of rotation of the lathe.
Regardless of the method chosen to do this, a mandrel will be necessary. Brownells sells a mandrel ($75-$126) for the Remington 700 and similar actions that is designed to fit in the bore of the receiver with only a few thousandths clearance. It also features a threaded collar that screws into the barrel threads in the receiver ring. You can also turn your own mandrel from bar stock.
 With your mandrel in the receiver, you have several ways to mount the receiver in the lathe in proper alignment. First, you can simply grind the outside of the receiver concentric with the bore (Brownells Receiver Contouring Fixture, $129, comes in handy for this) and then install it in your four-jaw chuck. Use a dial indicator on the mandrel to center things up precisely. This method greatly simplifies fixturing, but has the major drawback of removing metal from the receiver, making it a little less rigid and also giving it a slightly smaller diameter than the Remington's nominal 1.355-inch (which could be important when using a stock with an aluminum bedding block pre-contoured for the standard action size).
A variation on this theme—and one that does not remove metal from the receiver—is to secure a tight-fitting aluminum sleeve around the receiver and grind that sleeve concentric to the axis of the bore hole. The sleeved receiver is then installed in the lathe in the manner described above.
 Alternatively, you can use a fixture called a spider to center the receiver on its bore axis. The spider is essentially a heavy-walled steel tube whose bore is an inch or so greater in diameter than the receiver and which has four adjustment screws 90 degrees apart at each end. In use, the spider is mounted in the lathe's four-jaw chuck, and the receiver is inserted into the spider (receiver ring facing outward) and secured there by tightening the adjustment screws. The mandrel is inserted in the bore of the receiver so that at least five or six inches of it is left sticking out, and two dial indicators are put on the mandrel—one near the receiver ring and one near the far end of the mandrel. The adjustment screws in the spider are jockeyed around until both dial indicators indicate no more than 0.0005-inch runout (0.0000-inch is preferable, but devilishly hard to get). This makes the centerline of the bolt hole coincide perfectly with the axis of rotation of the lathe; the mandrel is removed at this point. Thus, provided the lathe is properly set up, any subsequent lathe operations will be true to that reference axis.
How much accuracy do you need?
Which steps are taken next depends upon the level of accurizing one aspires to. You can start by trueing the receiver face and the locking lug seats in the receiver ring. Leave a smooth surface but take off as little metal as possible. When doing these operations, you will usually begin cutting on one side; all you want to do is to deepen the cut until everything is even. usually only 0.002- to 0.003-inch of material needs to be removed. There is a small radius at the junction of the seats and the inside of the receiver ring—contour your cutter to preserve this radius.
 For a complete blueprinting, the barrel threads in the receiver ring should also be recut. The threads in many factory rifles were originally cut using a die, and thus may be neither concentric with nor parallel to the bolt hole axis. It is not uncommon to cut heavily on one side at first—I have often had to open up the thread diameter by 0.010-inch or more to get everything true.
I believe it's worth it to recut the barrel threads on any receiver for use in competition, but it may not be as important for less critical applications. I have seen many 1/2 MOA rifles—and a few 1/4 to 3/8 MOA guns—that were blueprinted except for the recutting of the barrel threads. Note that recutting the threads will make the factory barrel (or any barrel threaded to factory specs) fit too loosely, so that procedure is recommended only when you're rebarreling using an unthreaded barrel blank.
True the bolt
 The next step is to true the bolt. There are a number of ways of fixing the bolt in the lathe for this procedure, such as V-blocks clamped to the lathe faceplate. Over the years I have developed a liking for the La Bounty Bolt Fixture ($165 from Brownells). Part of the fixture is a thick cylinder held by the jaws of the chuck, while the other part projects forward and forms a sort of extended V-block with clamps that hold the bolt body in the V. It is massive, easy to use and, as far as I can tell, accurately machined to hold the bolt true.
With the bolt mounted in the fixture, it is an easy job to square the rear face of the locking lug seats, the bolt nose and the breechface. Only a couple of thousandths of metal normally needs to be removed to square everything. Again, note that there is a small radius at the junction of the locking lug with the bolt head proper. The cutter should be likewise radiused to preserve this contour.
Don't forget to remove the extractor and plunger ejector before machining the breechface in the bolt. Brownells makes a Remington Extractor Rivet Tool ($30) for reinstalling the extractor after machining is complete.
After the rear faces of the bolt lugs have been trued, the lugs are usually lapped into their seats in the receiver to obtain complete contact; Brownells' Bolt Lapping Tool ($53), used with J-B's Bore Paste, is perfect for this. I have often found, however, the action re-machining steps alone will produce 75 to 80 percent of full contact.
The last phase of accuracy work deals with the barrel. In some cases a barrel (often the factory barrel) that is already threaded and chambered is being installed; in others, installation involves a brand-new barrel blank that needs to be contoured, threaded, chambered and crowned.
Maximum accuracy
 Getting the most accuracy out of a factory barrel may involve little more than recrowning and trueing the barrel shoulder. The removal of any material from the shoulder will usually necessitate deepening the chamber by the same amount to preserve proper headspace. If the chamber is not concentric with the bore (as would occur if it was originally cut with a reamer that wobbled or wandered off-center), a reamer with a snug-fitting pilot can be used to deepen the chamber and eliminate the misalignment, provided the barrel is properly set up in the lathe. Of course, this requires that the chamber face, the barrel shoulder and the barrel tenon threads be adjusted by a like amount.
Installing a barrel blank involves a set sequence of steps. The blank should be cut to the approximate finished length and then put accurately between centers and either trued for its entire length or at least for the 2- to 3-inch segment forward of the receiver ring that will be put in the steady rest. A similar area at the muzzle end may also be trued. These steps are necessary because even on most top-flight name brand match barrels, the bore is not exactly concentric with the barrel's exterior. If such a barrel were put in the steady rest without first being trued, the bore would rotate eccentrically (wobble) making chambering a real adventure.
The trued barrel blank is then positioned with its chamber end in the steady rest, and the barrel threads are cut in the usual way. Care should be taken to have a perfectly square shoulder to mate with the trued receiver face. The bolt nose counterbore is then cut if necessary, depending on the make of the action and if the barrel is chambered. Finally, the muzzle end of the barrel is crowned; Brownells supplies various cutters for this, or standard lathe cutters can be used.
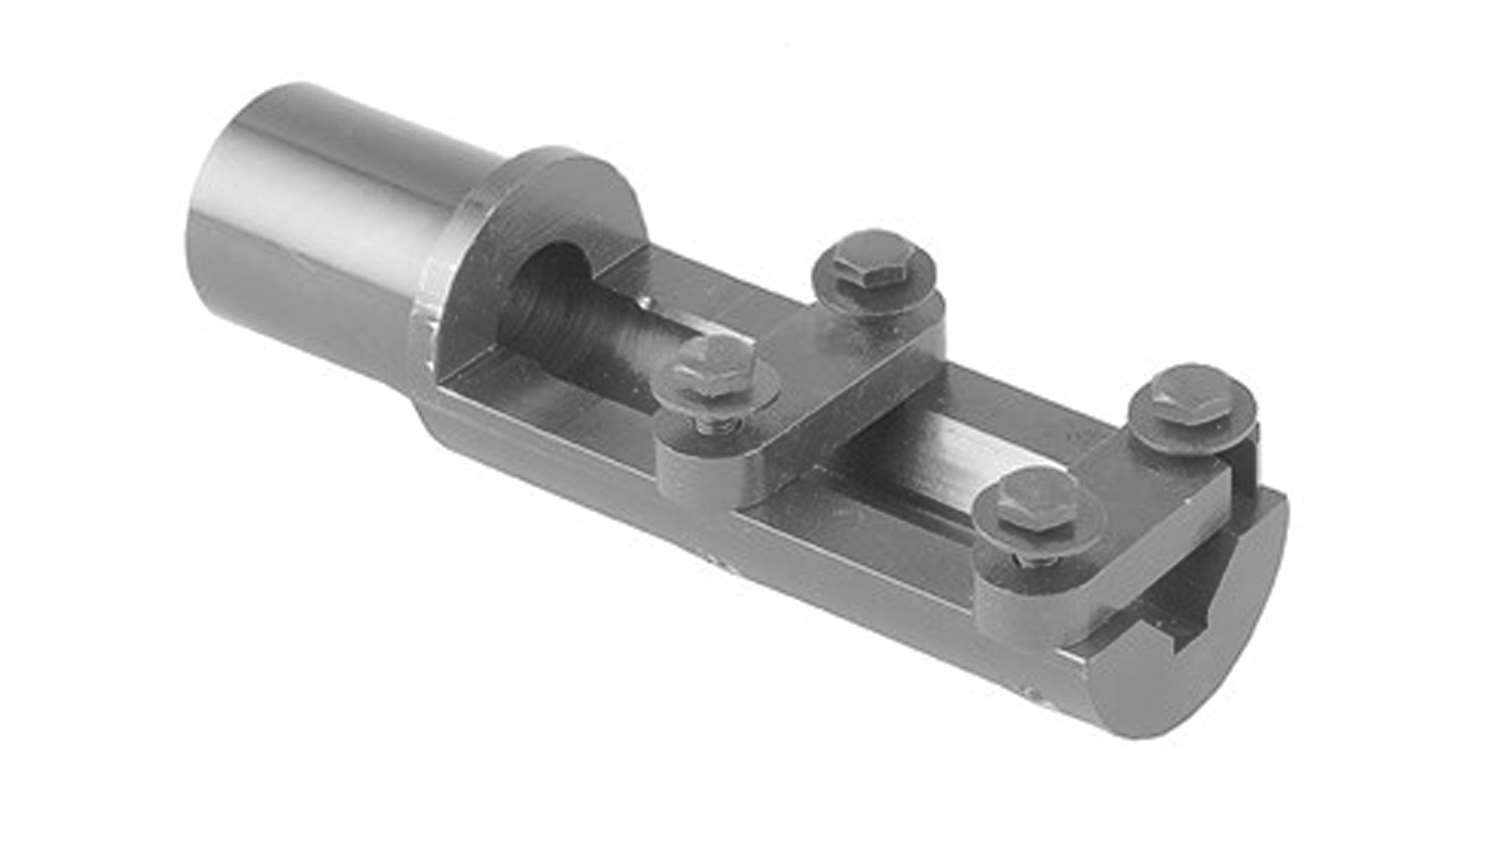
 Finally, on those rifles that utilize a recoil lug that is sandwiched between the barrel and receiver, it is customary to surface-grind both sides of the lug parallel in relation to each other. Again, not much usually needs to be removed—general 0.001-inch or less. Even though this step is presented last, it should be done before the chambering process is performed, as the lug is used when the action is assembled and headspace is evaluated. A Kleinendorst Remington 700 Barrel Tool ($41 from Brownells) can be used to hold the recoil lug in proper alignment while the barrel is tightened, or the Holland's Switch Barrel Drilling Fixture ($190 from MidwayUSA) can be used to install a retaining pin that goes through the lug to engage a hole in the receiver face and prevent lug rotation.
It must be stressed that trueing the receiver face, locking lug seats, bolt lugs, barrel shoulder or recoil lug and/or altering the depth of the chamber, can all alter headspace. Headspace gauges and an appropriate chamber reamer should thus be on hand during the work.
Though there are other, more specialized techniques for increasing rifle accuracy, such procedures are primarily of interest to those people for whom a 0.150-inch five-shot group is still just too darn big. For the rest of us, the basic accurizing techniques described above, in conjunction with a match grade barrel and a carefully worked-up handled, should give us all the accuracy we will ever need.
And if you do need more accuracy, check out SSUSA's ongoing series of handloading articles.
Sometimes this degree of accuracy is obtained through the use of a precisely machined custom action. Such actions are quite expensive and are prohibited in certain forms of competition. An alternative is to build a gun using a blueprinted factory action—an action that has been re-machined to bring critical surfaces into perfect alignment.
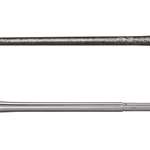
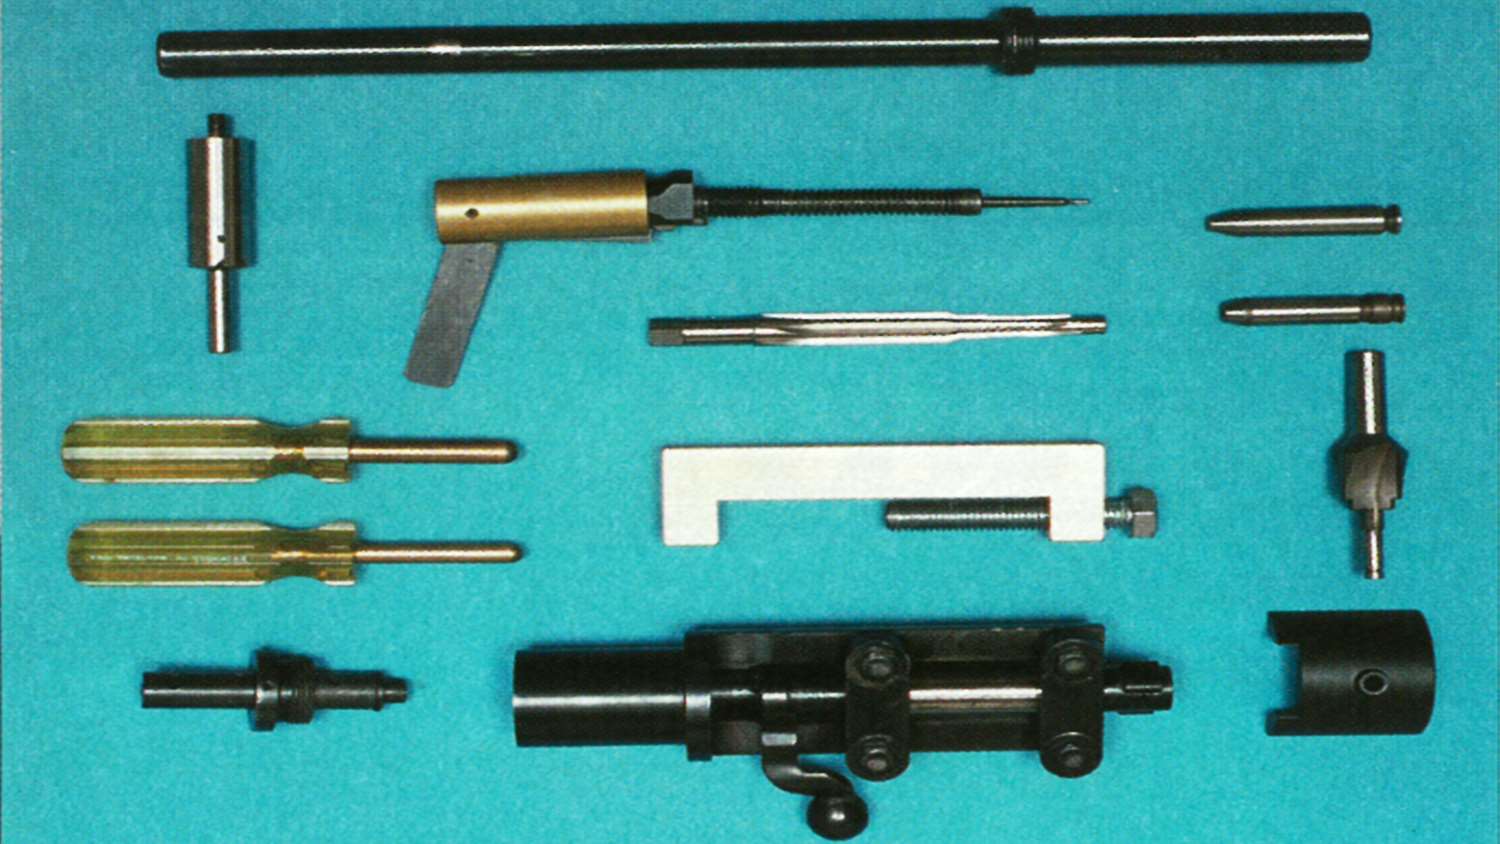
Some of the tools used to blueprint a rifle action.
Blueprinting (also called trueing) can also be a cost-effective way to begin competing at precision long-range matches with a rifle you probably already have in your gun safe.
For maximum accuracy, a barreled action should have a receiver with a bolt hole that is dead straight and centered in the receiver body. The axis of this hole becomes the reference axis with which the chamber, bore and barrel threads are perfectly aligned and to which the barrel shoulder, receiver face, locking lug seats, bolt lugs and breechface should be exactly perpendicular.
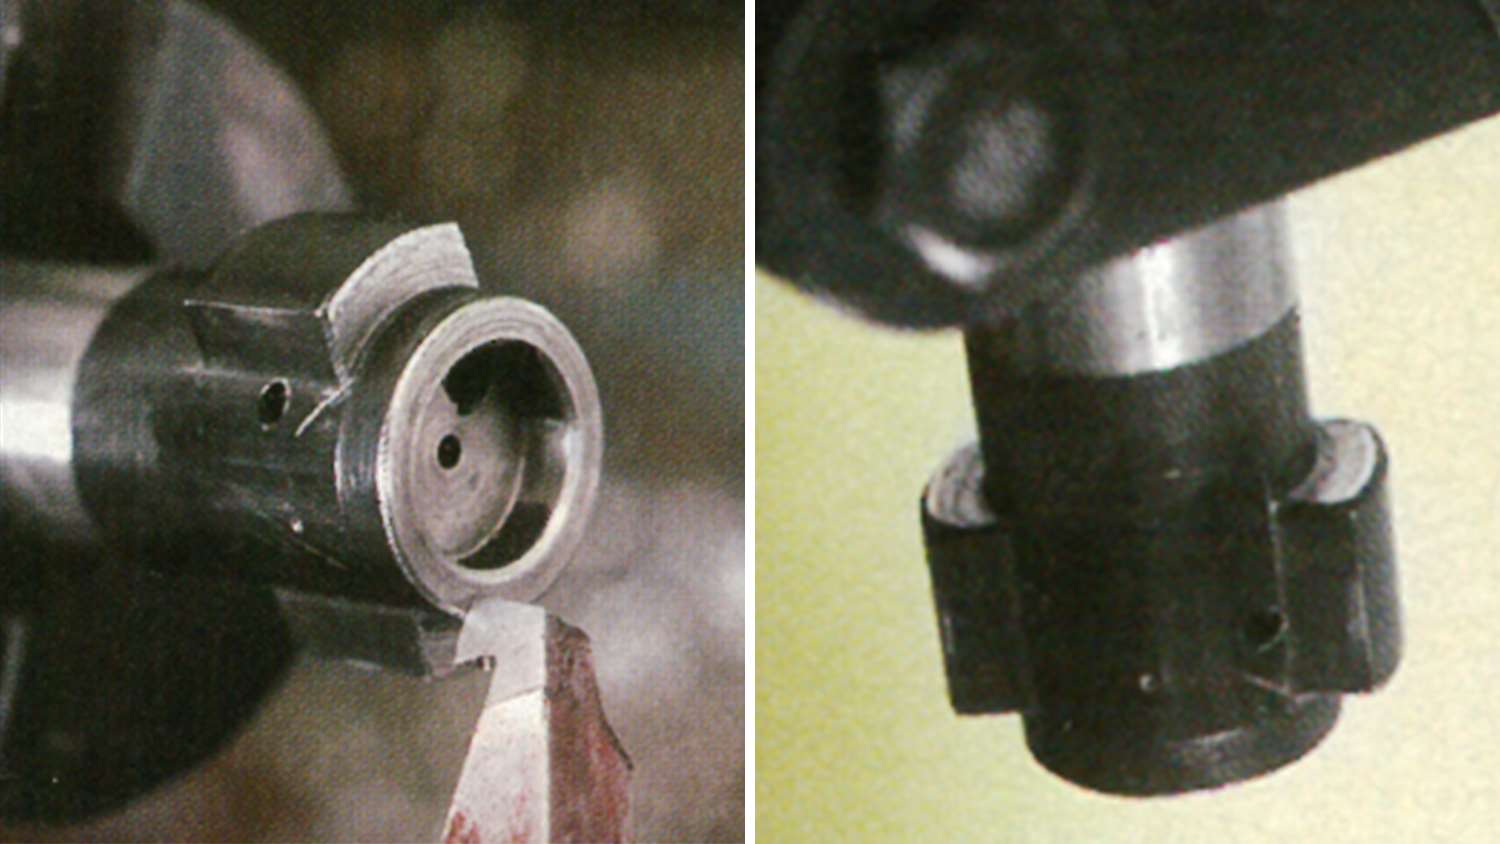
After disassembly of the rifle action and bolt and removal of the barrel, the bolt body can be placed in the fixture (left), and the rear breech face and bolt nose can be trued, as well as the rear faces of the locking lugs (right).
There's not any special magic to blueprinting a stock factory action—just careful attention to certain basic accurizing steps, which is what this article is all about. We'll be discussing Remington actions here because they are most often preferred by custom riflemakers; however, the basic accurizing steps can be applied to any turnbolt action.
Disassembly of the action and bolt
The first step in accurizing any bolt-action is to fully disassemble the action and bolt. A Kleinendorst Remington Bolt Disassembly Tool ($36 from Brownells) eases the task of removing the bolt shroud, firing pin and firing pin spring from the bolt body. When everything is apart, it's a good idea to degrease the components and inspect them for defects.
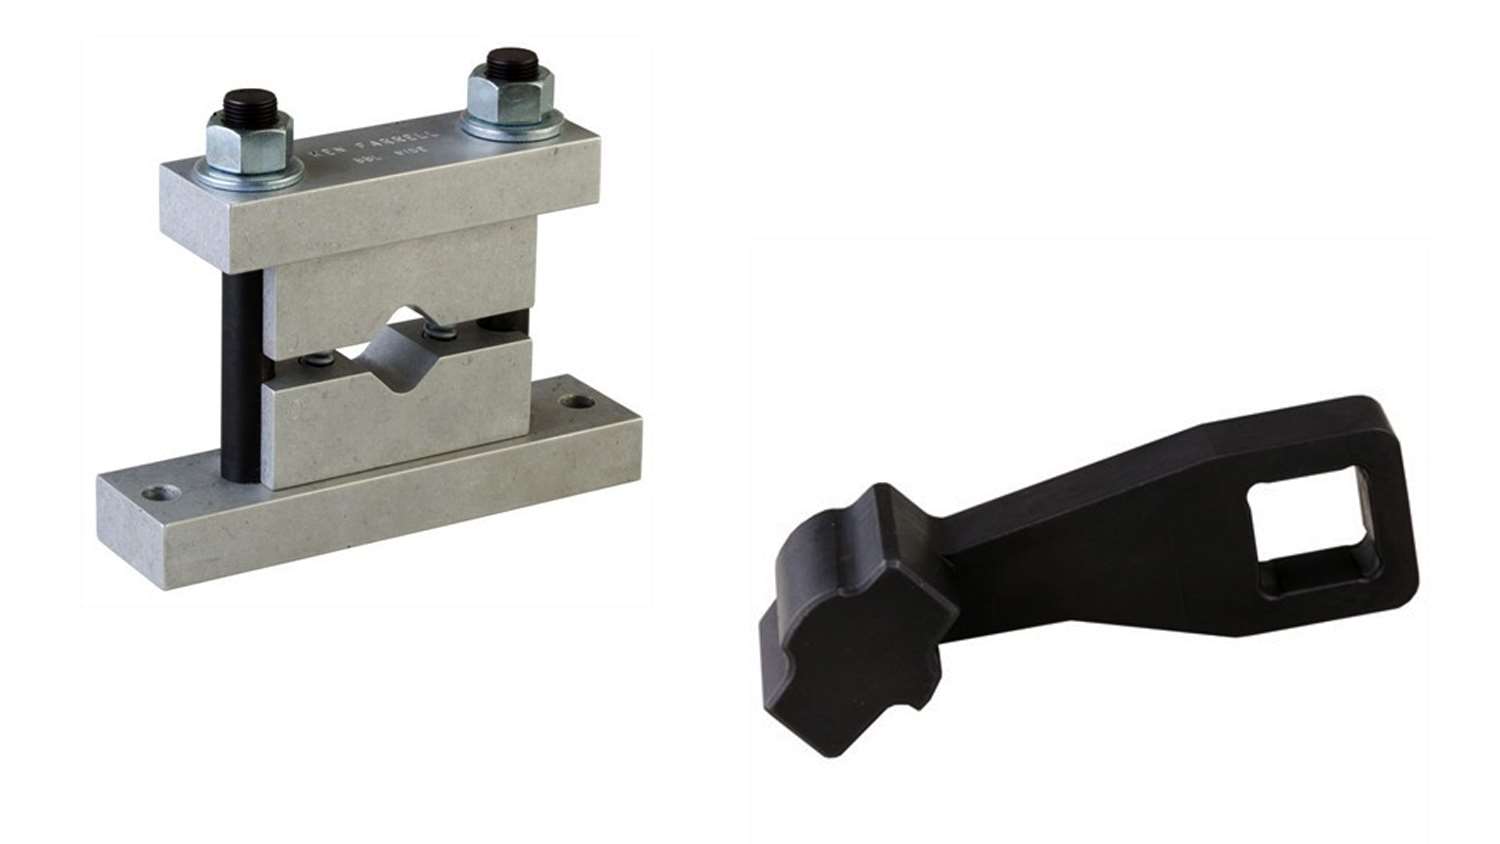
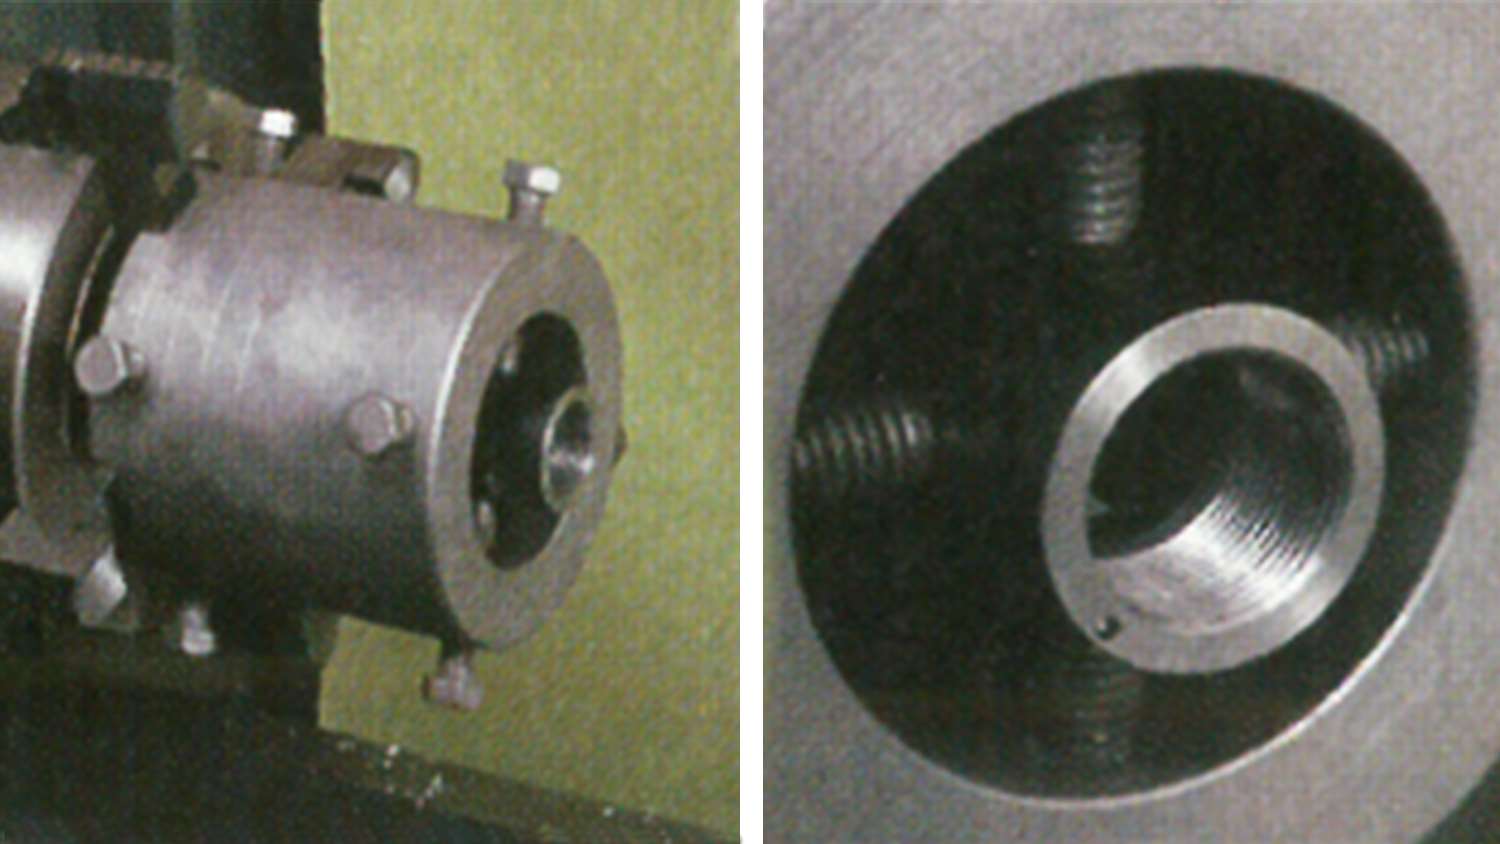
For barrel removal, the Farrell Industries Barrel Vice (left) and Surgeon Rifle Remington 700 Action Wrench are solid choices.
Once the barrel is off, there are a few paths one can go down to mount the receiver in the lathe so that all subsequent machining operations are true in relation to the reference axis—the centerline of the bolt hole. Another way of saying this is the receiver should be mounted in the lathe so that the centerline of the bolt hole perfectly coincides with the axis of rotation of the lathe.
Regardless of the method chosen to do this, a mandrel will be necessary. Brownells sells a mandrel ($75-$126) for the Remington 700 and similar actions that is designed to fit in the bore of the receiver with only a few thousandths clearance. It also features a threaded collar that screws into the barrel threads in the receiver ring. You can also turn your own mandrel from bar stock.
This Brownells Receiver Contouring Fixture makes sure work is square to the receiver.
A variation on this theme—and one that does not remove metal from the receiver—is to secure a tight-fitting aluminum sleeve around the receiver and grind that sleeve concentric to the axis of the bore hole. The sleeved receiver is then installed in the lathe in the manner described above.
To begin blueprinting a receiver, it is first mounted in the lathe (left) so that its axis of rotation coincides with the center of the bolt hole. This device (right) is a spider that grips the receiver with four adjustment screws.
How much accuracy do you need?
Which steps are taken next depends upon the level of accurizing one aspires to. You can start by trueing the receiver face and the locking lug seats in the receiver ring. Leave a smooth surface but take off as little metal as possible. When doing these operations, you will usually begin cutting on one side; all you want to do is to deepen the cut until everything is even. usually only 0.002- to 0.003-inch of material needs to be removed. There is a small radius at the junction of the seats and the inside of the receiver ring—contour your cutter to preserve this radius.
This Manson Precision Receiver Ring Facing Cutter utilizes three carbide cutters for even pressure to square up the face of a receiver.
I believe it's worth it to recut the barrel threads on any receiver for use in competition, but it may not be as important for less critical applications. I have seen many 1/2 MOA rifles—and a few 1/4 to 3/8 MOA guns—that were blueprinted except for the recutting of the barrel threads. Note that recutting the threads will make the factory barrel (or any barrel threaded to factory specs) fit too loosely, so that procedure is recommended only when you're rebarreling using an unthreaded barrel blank.
True the bolt
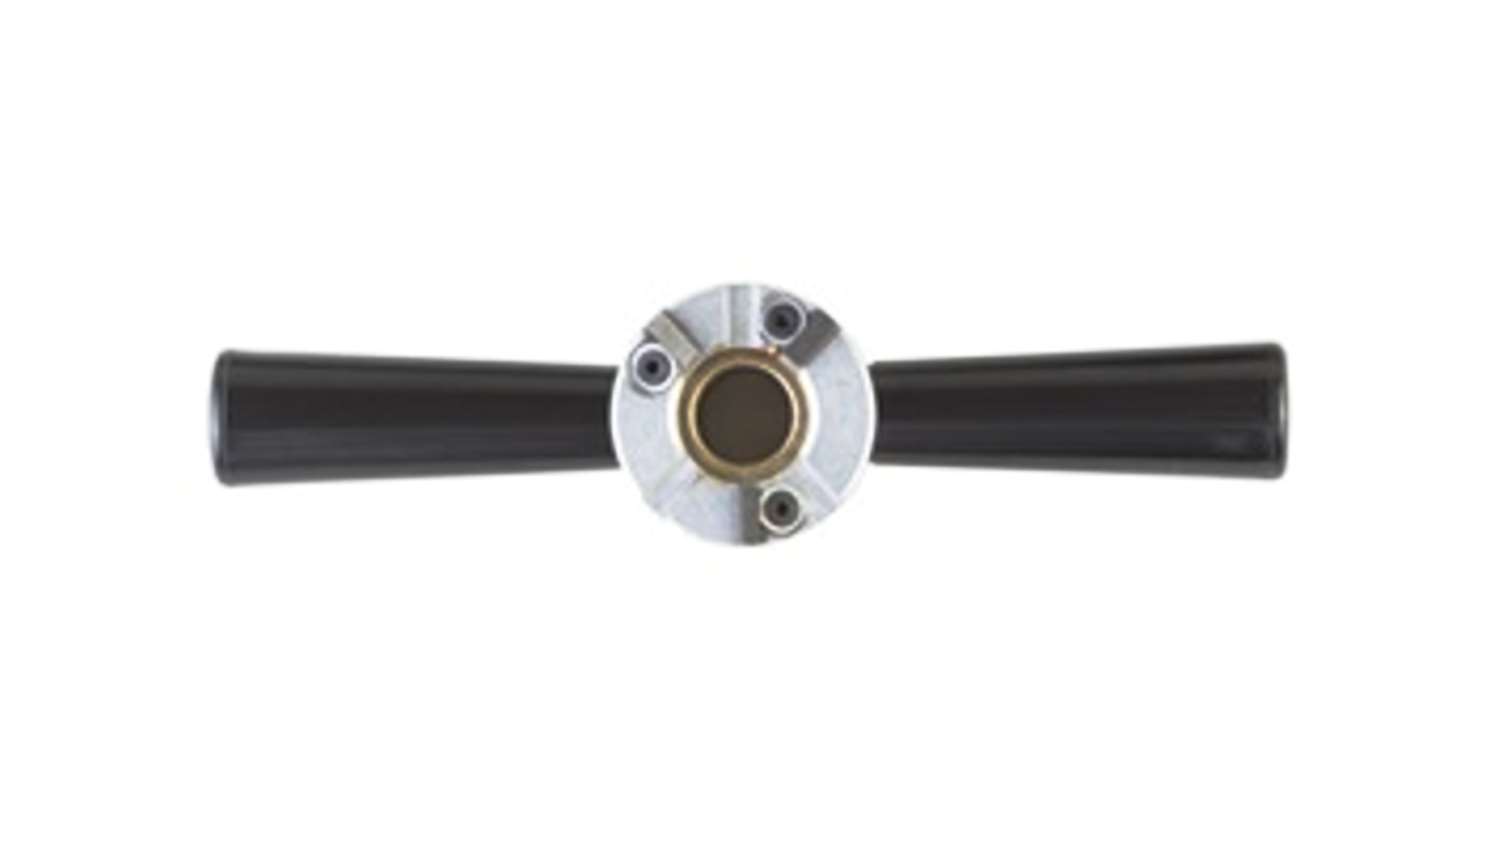
A La Bounty Bolt Fixture ensures the bolt runs true and is centered in relation to its axis of rotation.
With the bolt mounted in the fixture, it is an easy job to square the rear face of the locking lug seats, the bolt nose and the breechface. Only a couple of thousandths of metal normally needs to be removed to square everything. Again, note that there is a small radius at the junction of the locking lug with the bolt head proper. The cutter should be likewise radiused to preserve this contour.
Don't forget to remove the extractor and plunger ejector before machining the breechface in the bolt. Brownells makes a Remington Extractor Rivet Tool ($30) for reinstalling the extractor after machining is complete.
After the rear faces of the bolt lugs have been trued, the lugs are usually lapped into their seats in the receiver to obtain complete contact; Brownells' Bolt Lapping Tool ($53), used with J-B's Bore Paste, is perfect for this. I have often found, however, the action re-machining steps alone will produce 75 to 80 percent of full contact.
The last phase of accuracy work deals with the barrel. In some cases a barrel (often the factory barrel) that is already threaded and chambered is being installed; in others, installation involves a brand-new barrel blank that needs to be contoured, threaded, chambered and crowned.
Maximum accuracy
This barrel is about to be finished with a brass tool and some fine abrasive paste.
Installing a barrel blank involves a set sequence of steps. The blank should be cut to the approximate finished length and then put accurately between centers and either trued for its entire length or at least for the 2- to 3-inch segment forward of the receiver ring that will be put in the steady rest. A similar area at the muzzle end may also be trued. These steps are necessary because even on most top-flight name brand match barrels, the bore is not exactly concentric with the barrel's exterior. If such a barrel were put in the steady rest without first being trued, the bore would rotate eccentrically (wobble) making chambering a real adventure.
The trued barrel blank is then positioned with its chamber end in the steady rest, and the barrel threads are cut in the usual way. Care should be taken to have a perfectly square shoulder to mate with the trued receiver face. The bolt nose counterbore is then cut if necessary, depending on the make of the action and if the barrel is chambered. Finally, the muzzle end of the barrel is crowned; Brownells supplies various cutters for this, or standard lathe cutters can be used.
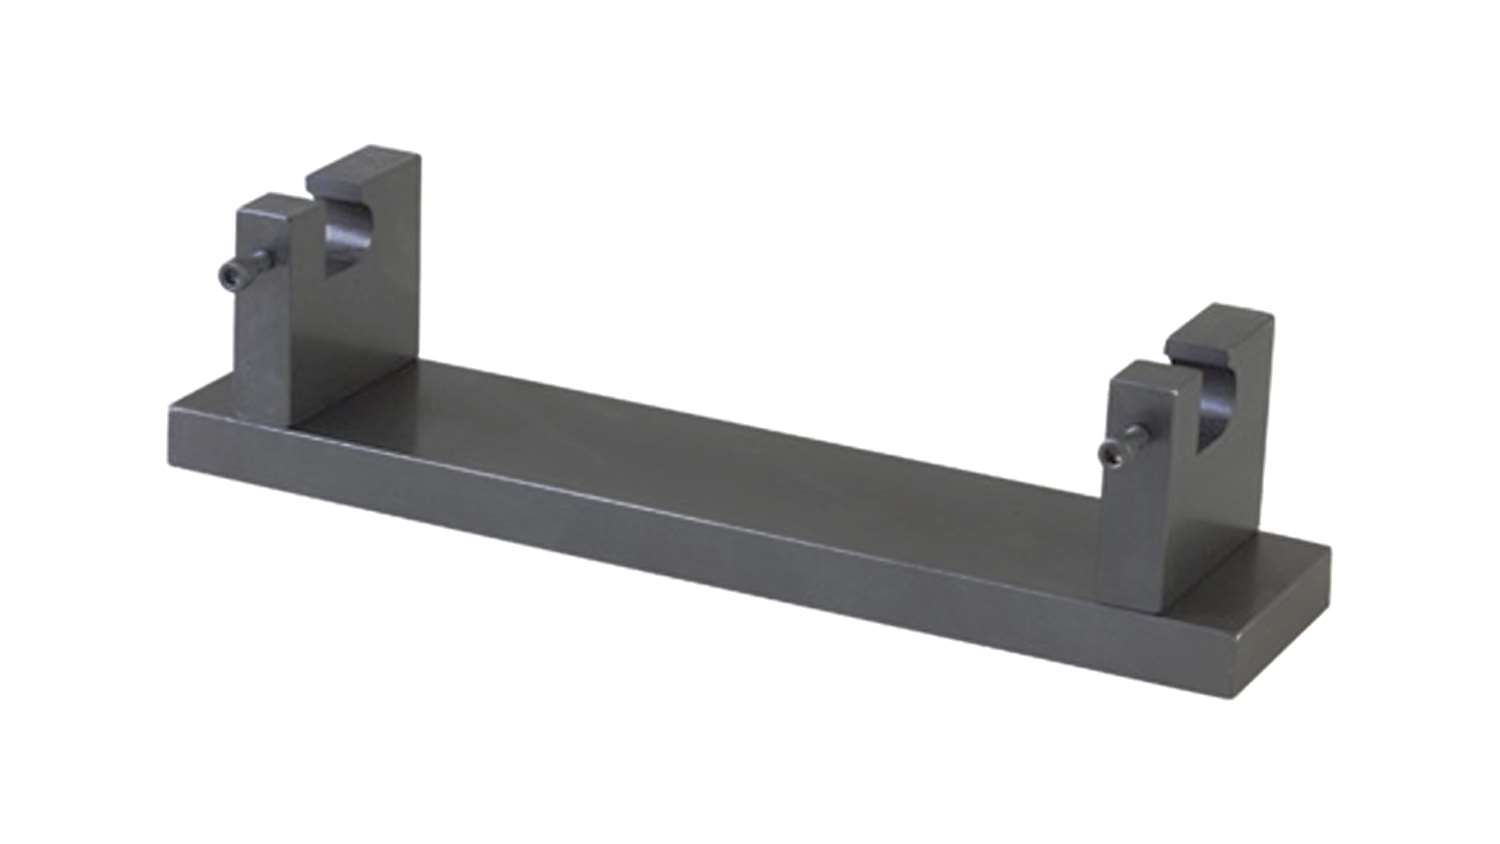
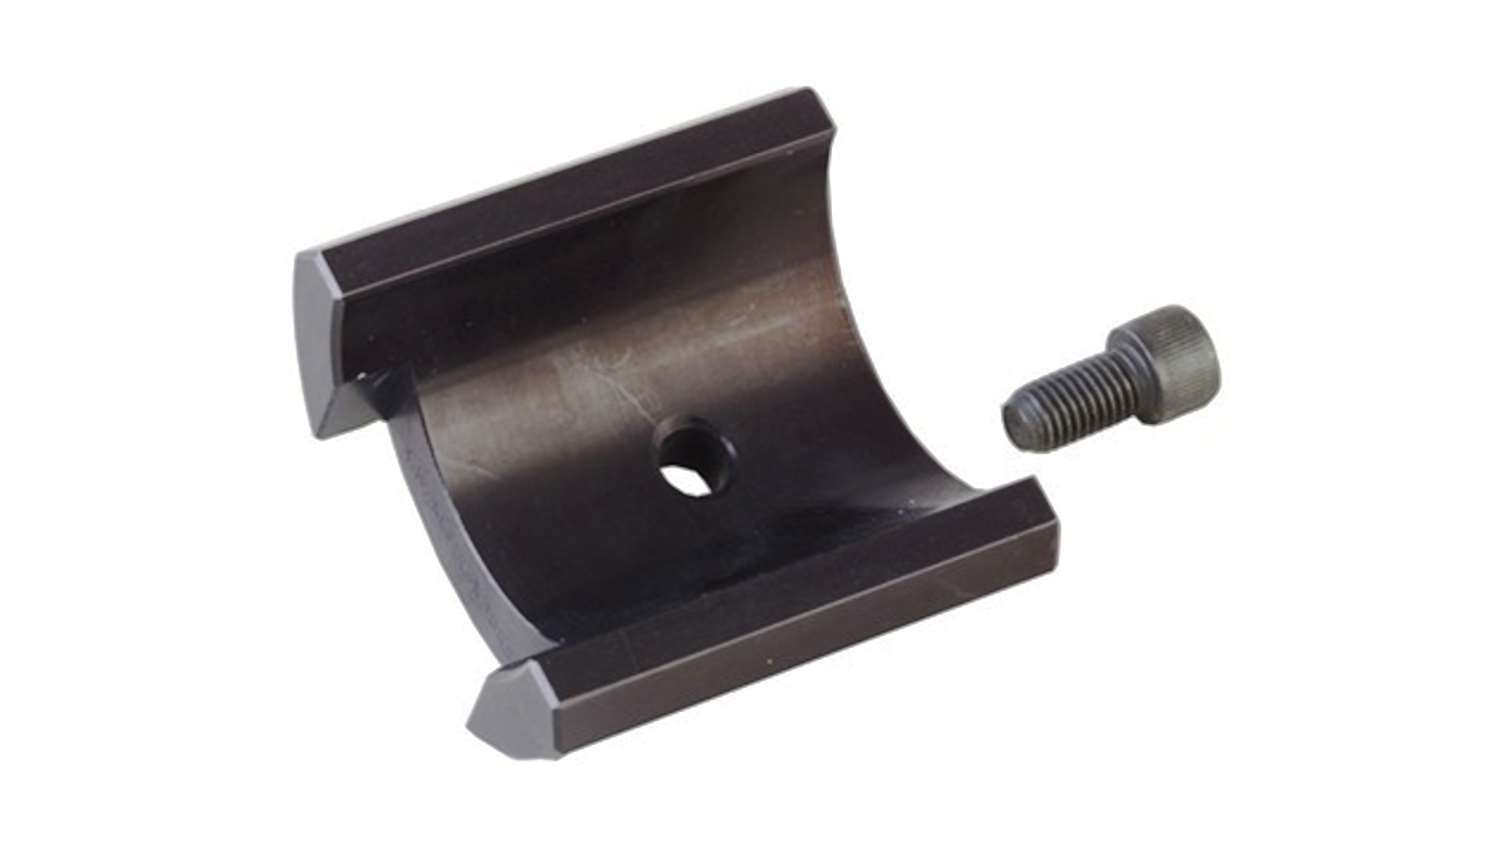
A precisely milled slot in the front of the Kleinendorst Remington 700 F/S Recoil Lug Alignment Tool allows for proper positioning of the recoil lug.
It must be stressed that trueing the receiver face, locking lug seats, bolt lugs, barrel shoulder or recoil lug and/or altering the depth of the chamber, can all alter headspace. Headspace gauges and an appropriate chamber reamer should thus be on hand during the work.
Though there are other, more specialized techniques for increasing rifle accuracy, such procedures are primarily of interest to those people for whom a 0.150-inch five-shot group is still just too darn big. For the rest of us, the basic accurizing techniques described above, in conjunction with a match grade barrel and a carefully worked-up handled, should give us all the accuracy we will ever need.
And if you do need more accuracy, check out SSUSA's ongoing series of handloading articles.
Most Popular