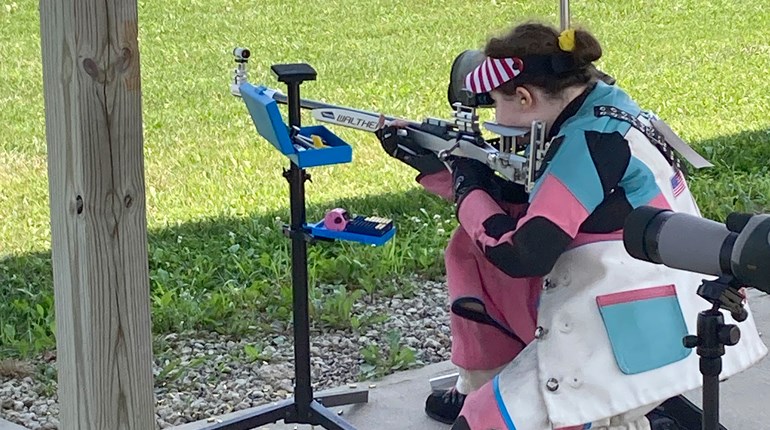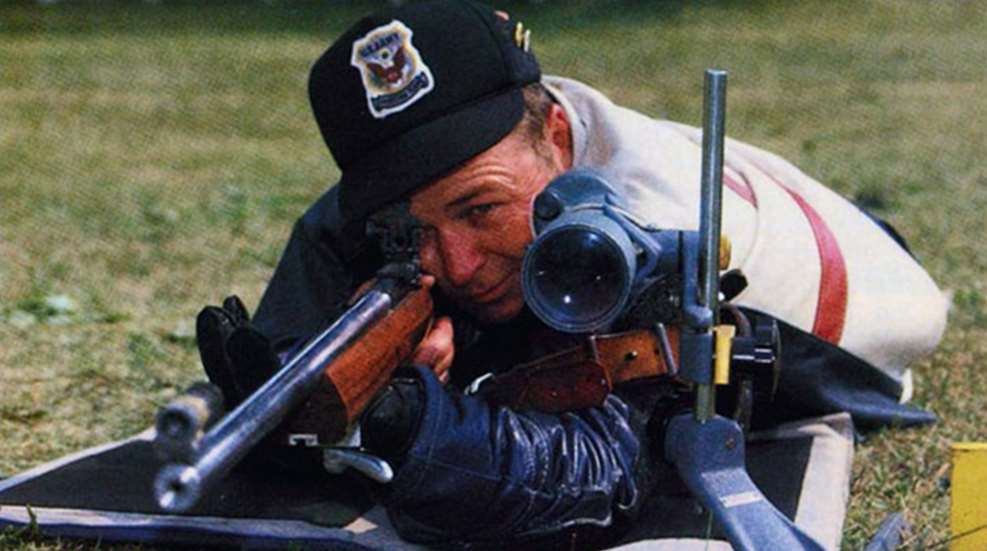
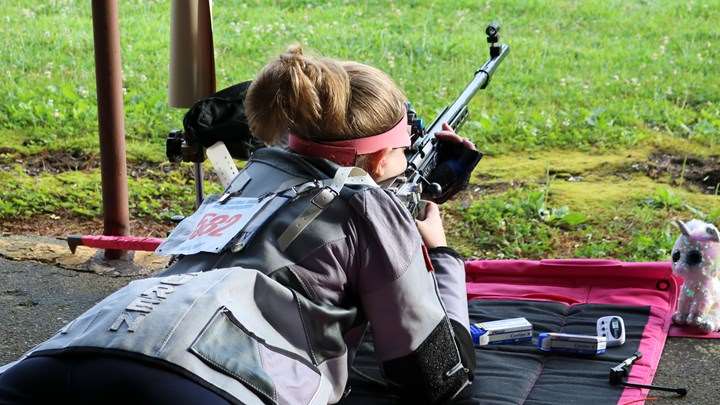
The prone position is the most precise of the rifle shooting positions. It is used in many different shooting events at distances as close as 5 meters and as far away as 1,000 yards, and beyond that in long-range disciplines such as PRS and NRL. Prone shooting is very popular among shooters whose training time is limited, because it does not require as much practice. Age has little effect on a shooter's ability to do well in prone; many older shooters are able to continue competing successfully in prone matches.
Six steps are used to get into the prone position.
Step One: Study the Position
The prone position is steady because it is low, which gives a wide base of support to help keep the rifle still. Below are the key features of the prone position.
- Straight line form left hand through left arm, side and leg.
- Head tipped down comfortably.
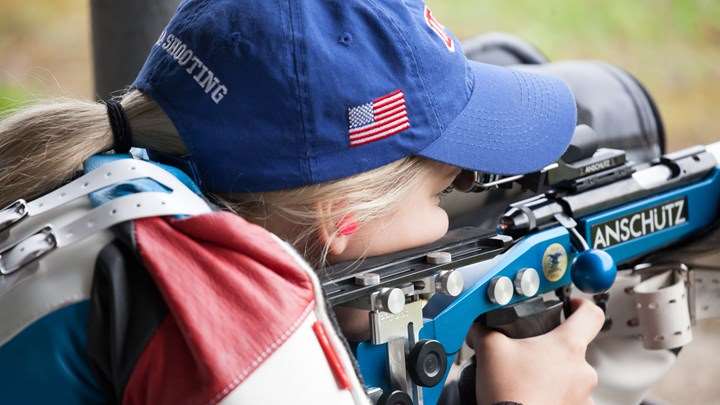
- Right hand grips rifle lightly.
- Body lies behind rifle. Angle to rifle is 10 to 20 degrees.
- Right knee bent slightly, toe pointing out.
- Rifle lies on heel of left hand, fingers relaxed.
- Left elbow rests to left of rifle.
- Sling (if present) supports weight of rifle. Left arm relaxed.
- Body rests slightly more on left side.
- Left leg straight, toe pointing inward or straight back.
A good tip is to head to your local range and study the prone position of an advanced shooter.
Step Two: Practice the Body Position
Begin to build your prone position by trying first without a rifle. The numbered points show the position's important checkpoints and the order in which they should be developed.
- Lie down with body pointed just to right of aiming area.
- Place left elbow in front of body to support upper body.
- Keep left leg straight, with toe pointing in or straight back.
- Bend right knee, point foot out.
- Put right elbow in position to help hold upper body.
Step Three: Practice the Rifle Position
Next get into the prone position with a rifle, but without the sling. This is a highly important step in positions where a sling is used because it is the best way to find the correct place for the left hand and the sling swivel on the fore-end of the rifle.
- Place rifle in shoulder. Keep stock high enough to provide comfortable head position so eyes look easily through sights.
- Rest rifle on heel of left hand. Raise or lower rifle by moving hand forward and back until rifle barrel is level.
- Grasp pistol grip lightly with right hand.
- Mark location of V in left hand. Move sling swivel back to V in hand if adjustable.
Step Four: Adjust the Sling (if applicable)
Finding the correct location for the left hand on the fore-end of the rifle is a necessary first step in sling adjustment. As soon as that is done, you should put the sling on your own arm, get into position with the sling and complete its adjustment. Here is the correct sequence.
- Kneel on the firing point.
- Rest the barrel on the right shoulder.
- Form a loop with the sling, and twist the loop half a turn clockwise.
- Put the sling high on the arm and tighten the sling keeper.
- Wrap the arm around the sling so that the sling comes across the left hand and forearm.
- Put the rifle back into position with the sling loose. Be sure the left hand is in its marked place.
- Tighten the sling so that when the rifle is in position the sling, not the muscles of the left arm, holds the rifle. Mark the sling adjustment.
Sling Adjustment with Fixed Sling Swivel. Some rifles used by young shooters have a fixed sling swivel rather than a rail that permits sling swivel adjustment. These rifles can be used successfully as long as the left hand is placed on the fore-end at the place found in Step Three and the hand is not pushed forward to contact the sling swivel. A glove will help keep the hand from slipping.
For rifles with fixed sling swivels, use a mark on the fore-end to return the left hand to the correct position.
Step Five: Align the Position
Next, put up a target and check the position for proper alignment. This is called finding your natural point of aim. To shoot good prone position scores, your natural point of aim must be aligned on the target. Here is how to align your position.
- Hang a target and get into position.
- Look through the sights and aim, then look down and away from target, but keep the eyes open.
- Let the body relax until the rifle points where it wants to point naturally.
- Then look up to see if the sights are still pointing at the target.
- If the rifle is pointing to the left or right, turn the entire body and rifle.
- If the rifle is pointing high, lower the rifle by lengthening the sling and moving the sling swivel forward.
- If the rifle is pointing low, raise the rifle by shortening the sling and moving the sling swivel back. Small adjustments in the sling and sling swivel can move the rifle a great distance in relation to the target.
When you first start to shoot prone, it is important to check the alignment of your position each time you shoot. One of the secrets of good prone shooting is having a position that is always naturally aligned on the target. This is so you do not have to force the rifle to point at the target.
Step Six: Shoot in Position
Firing the shot in prone is very much like firing the shot in the supported position. Each time you load, carefully replace the buttplate in your shoulder and settle into position. Be sure your left arm and shoulder are relaxed; let the sling hold up the rifle. When you begin to aim at the target, center your hold movements, hold as steady as you can and pull the trigger smoothly without disturbing your hold.
Now that you have the tools to master the prone position, begin shooting by dry-firing several shots, then shoot a group of five live-fire shots. Continue to shoot in this way, first dry-firing and then live-firing. Keep practicing and develop and refine your prone position skills.
See more: Our Top 5 Tips To Master Standing Position