If you’ve never cleaned your Ruger 10/22’s rotary magazine because it seems too complex to take apart and reassemble, we’re going to demystify the process for you. In order to avoid struggling with its spring-loaded reassembly after cleaning, we’ll show you an inexpensive tool to improve your quality of life: the Tandemkross 10/22 Mag Tuner and Assembly Tool.
While disassembling the 10/22 rotary magazine is no big deal, reassembly can be tricky, especially since the spring must be rewound to exactly the correct tension or the magazine will not feed properly.
The middle of a match, when your 10/22 goes “click” instead of “bang,” is no time to discover it’s gummed up with bullet wax and crud, or that you wound the magazine spring a bit too loose. To avoid this debacle, let’s take the mag apart, clean and reassemble it properly to ensure trouble-free operation.
Simple Takedown
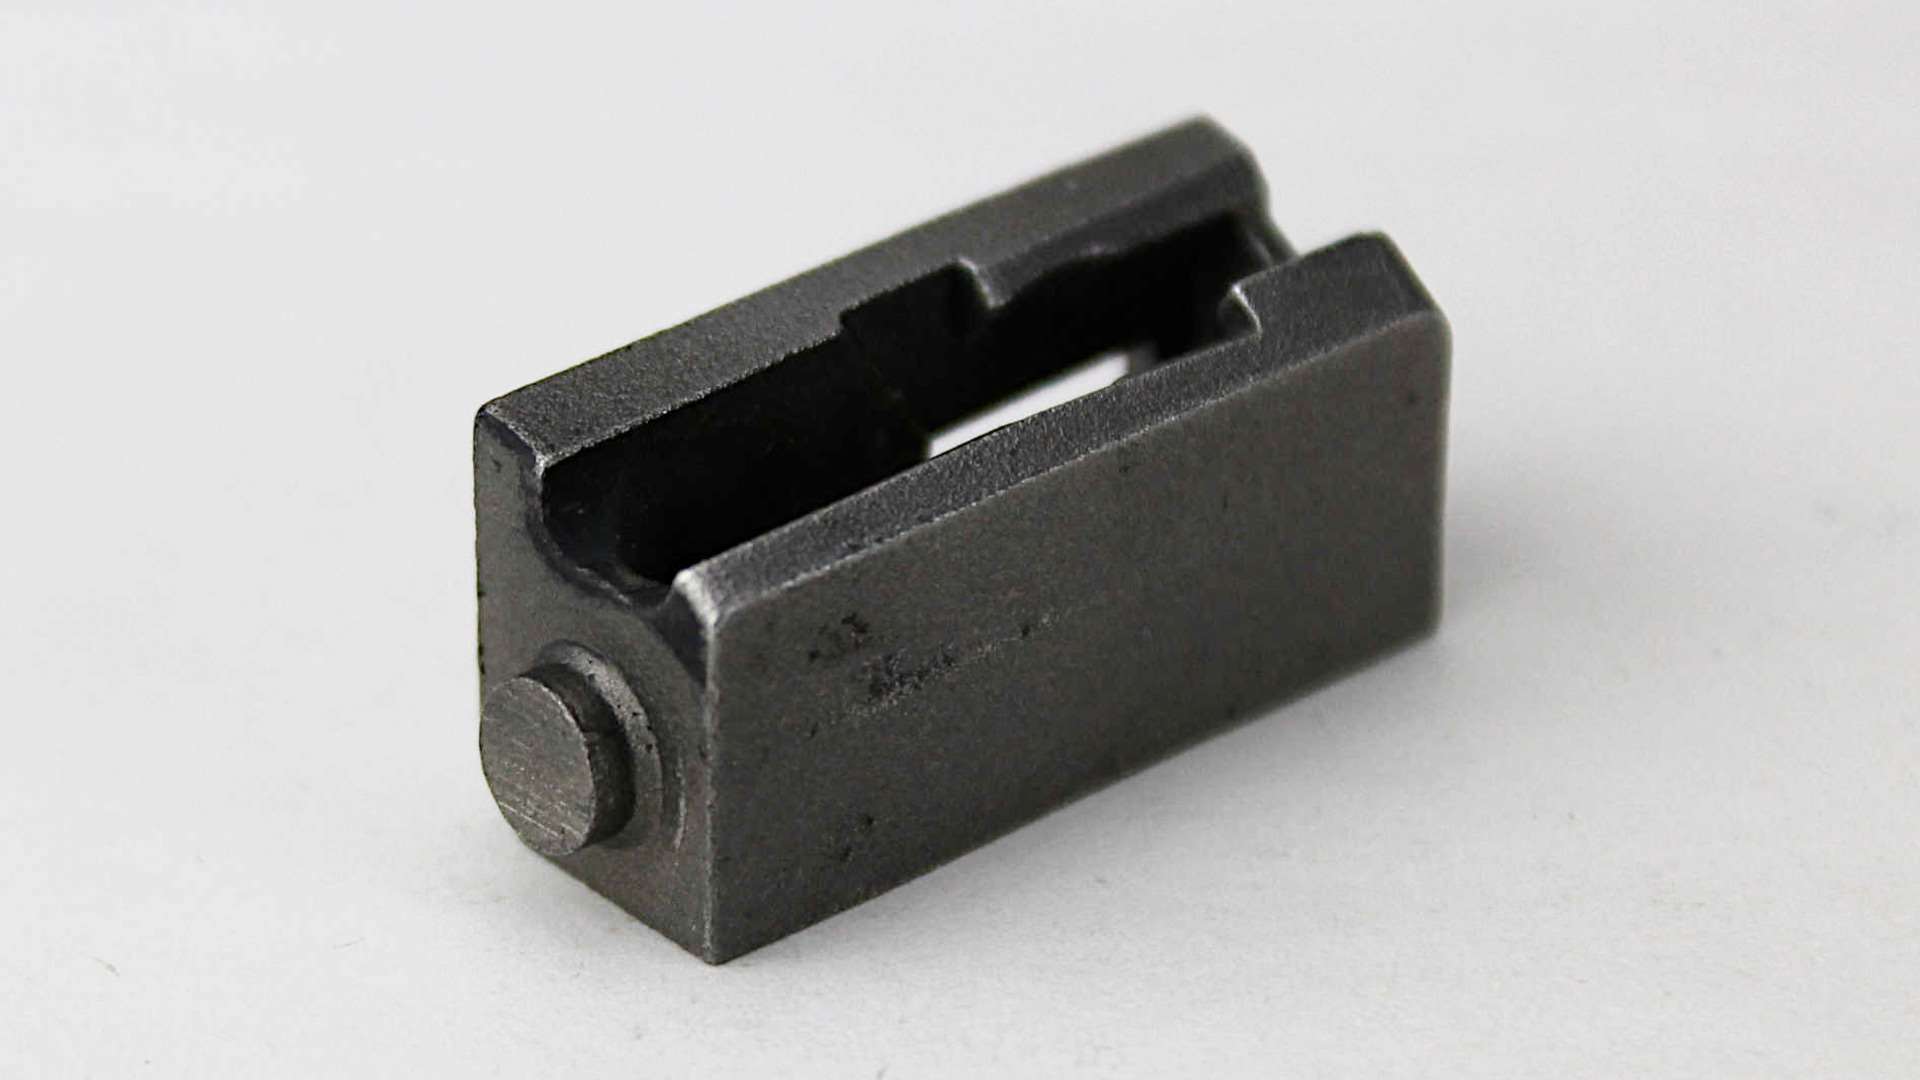
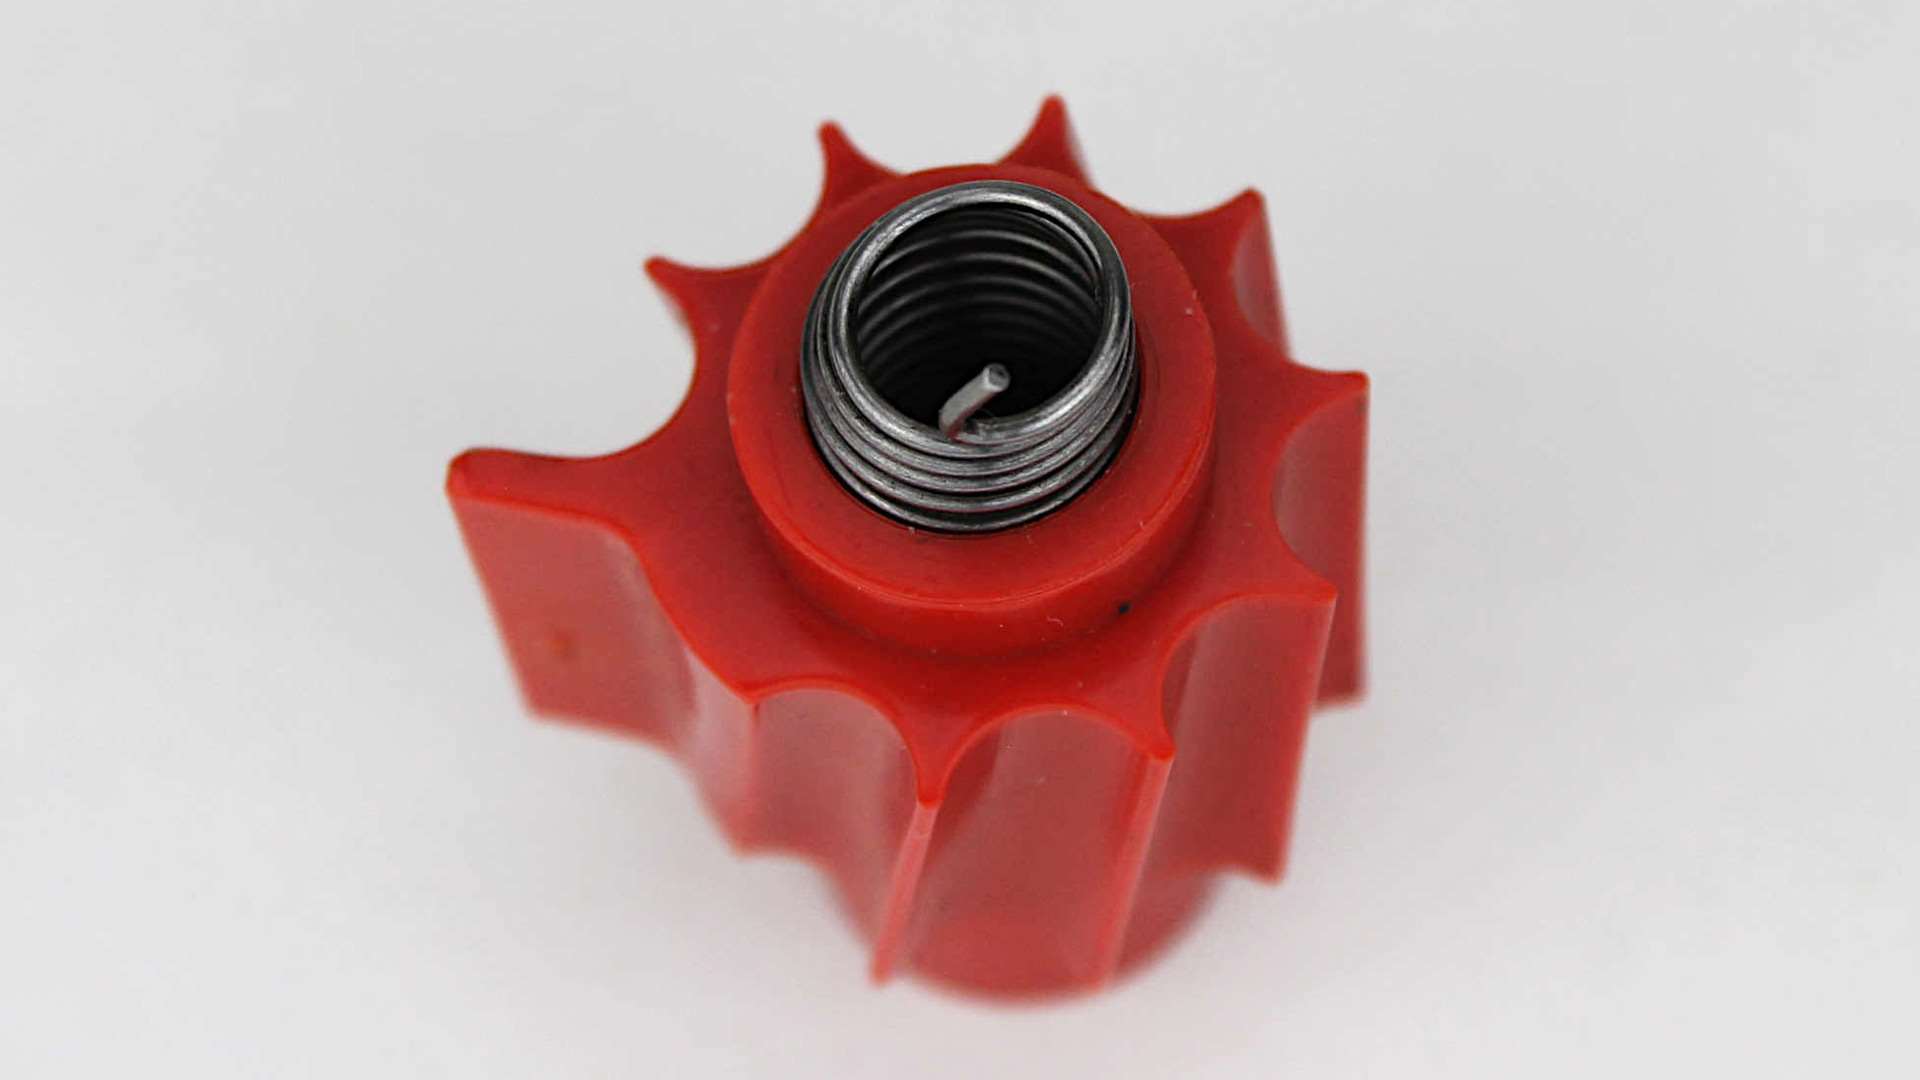
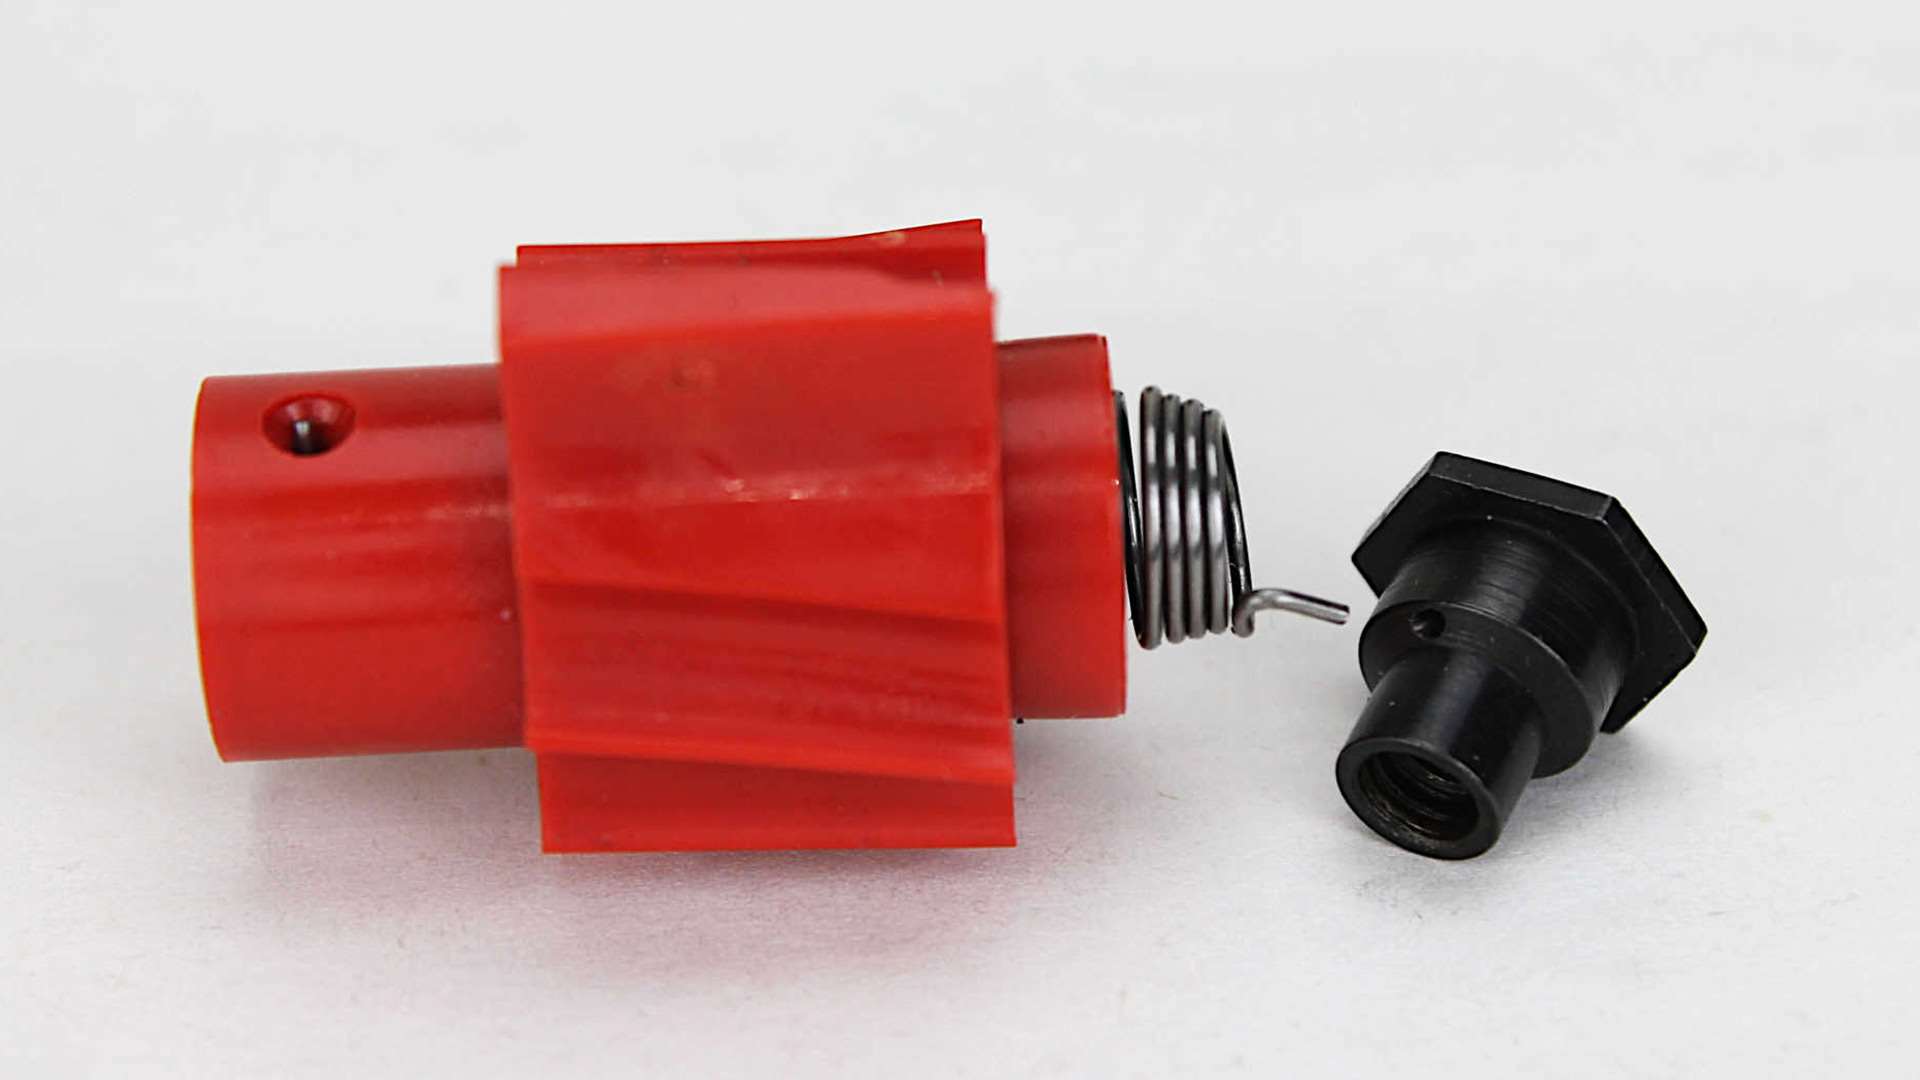
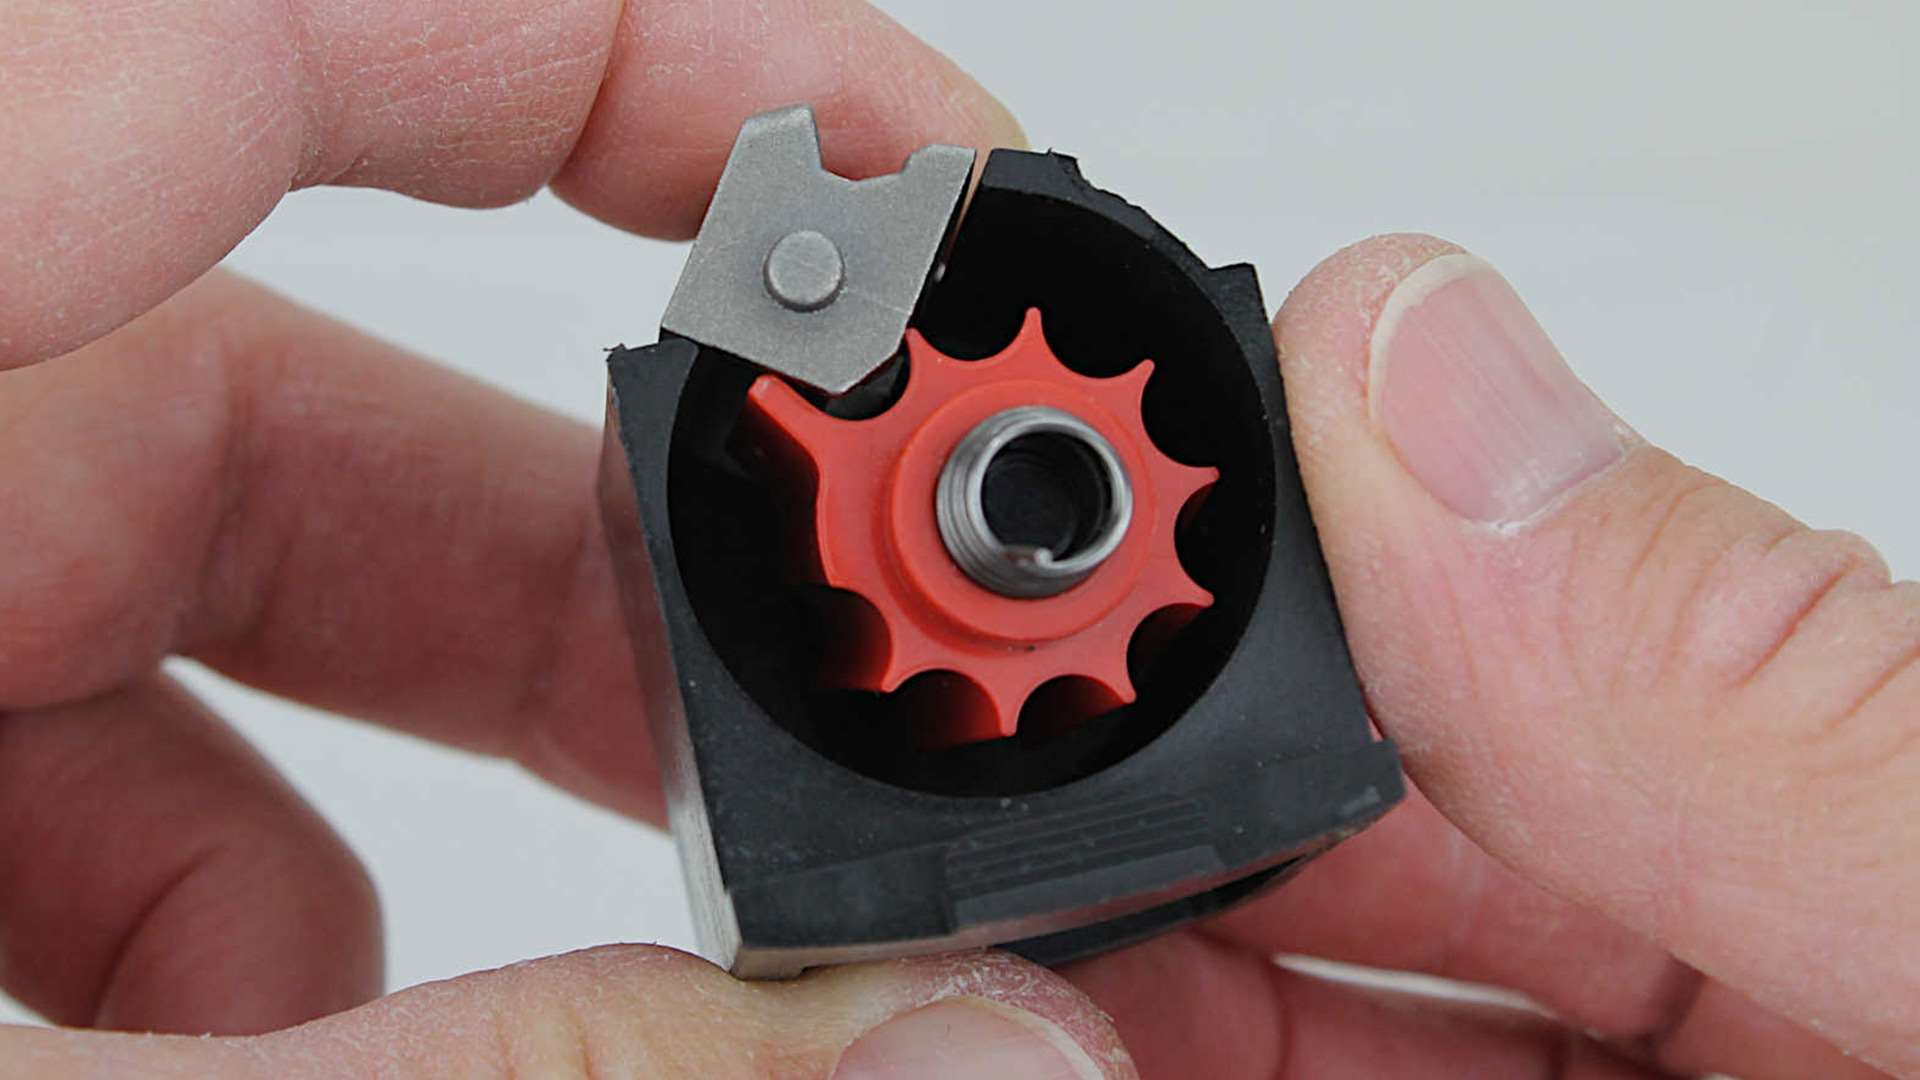
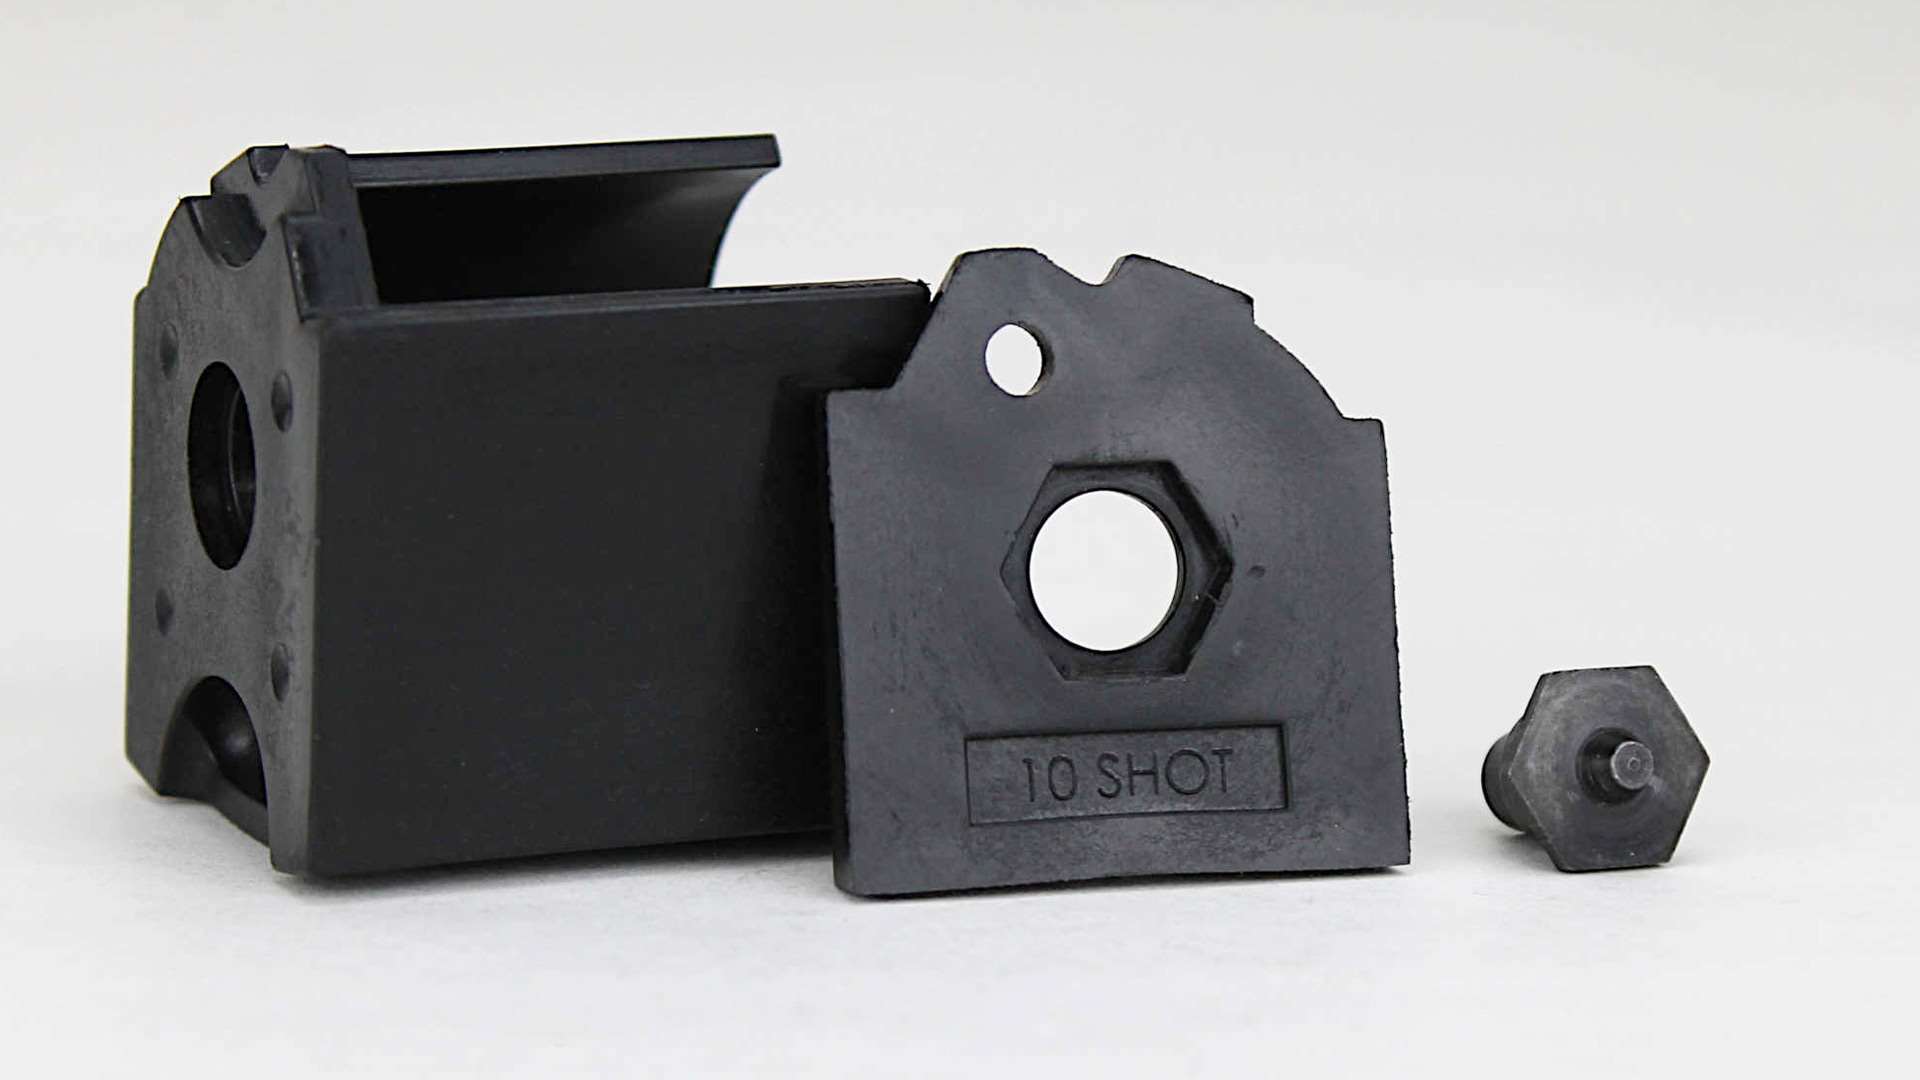
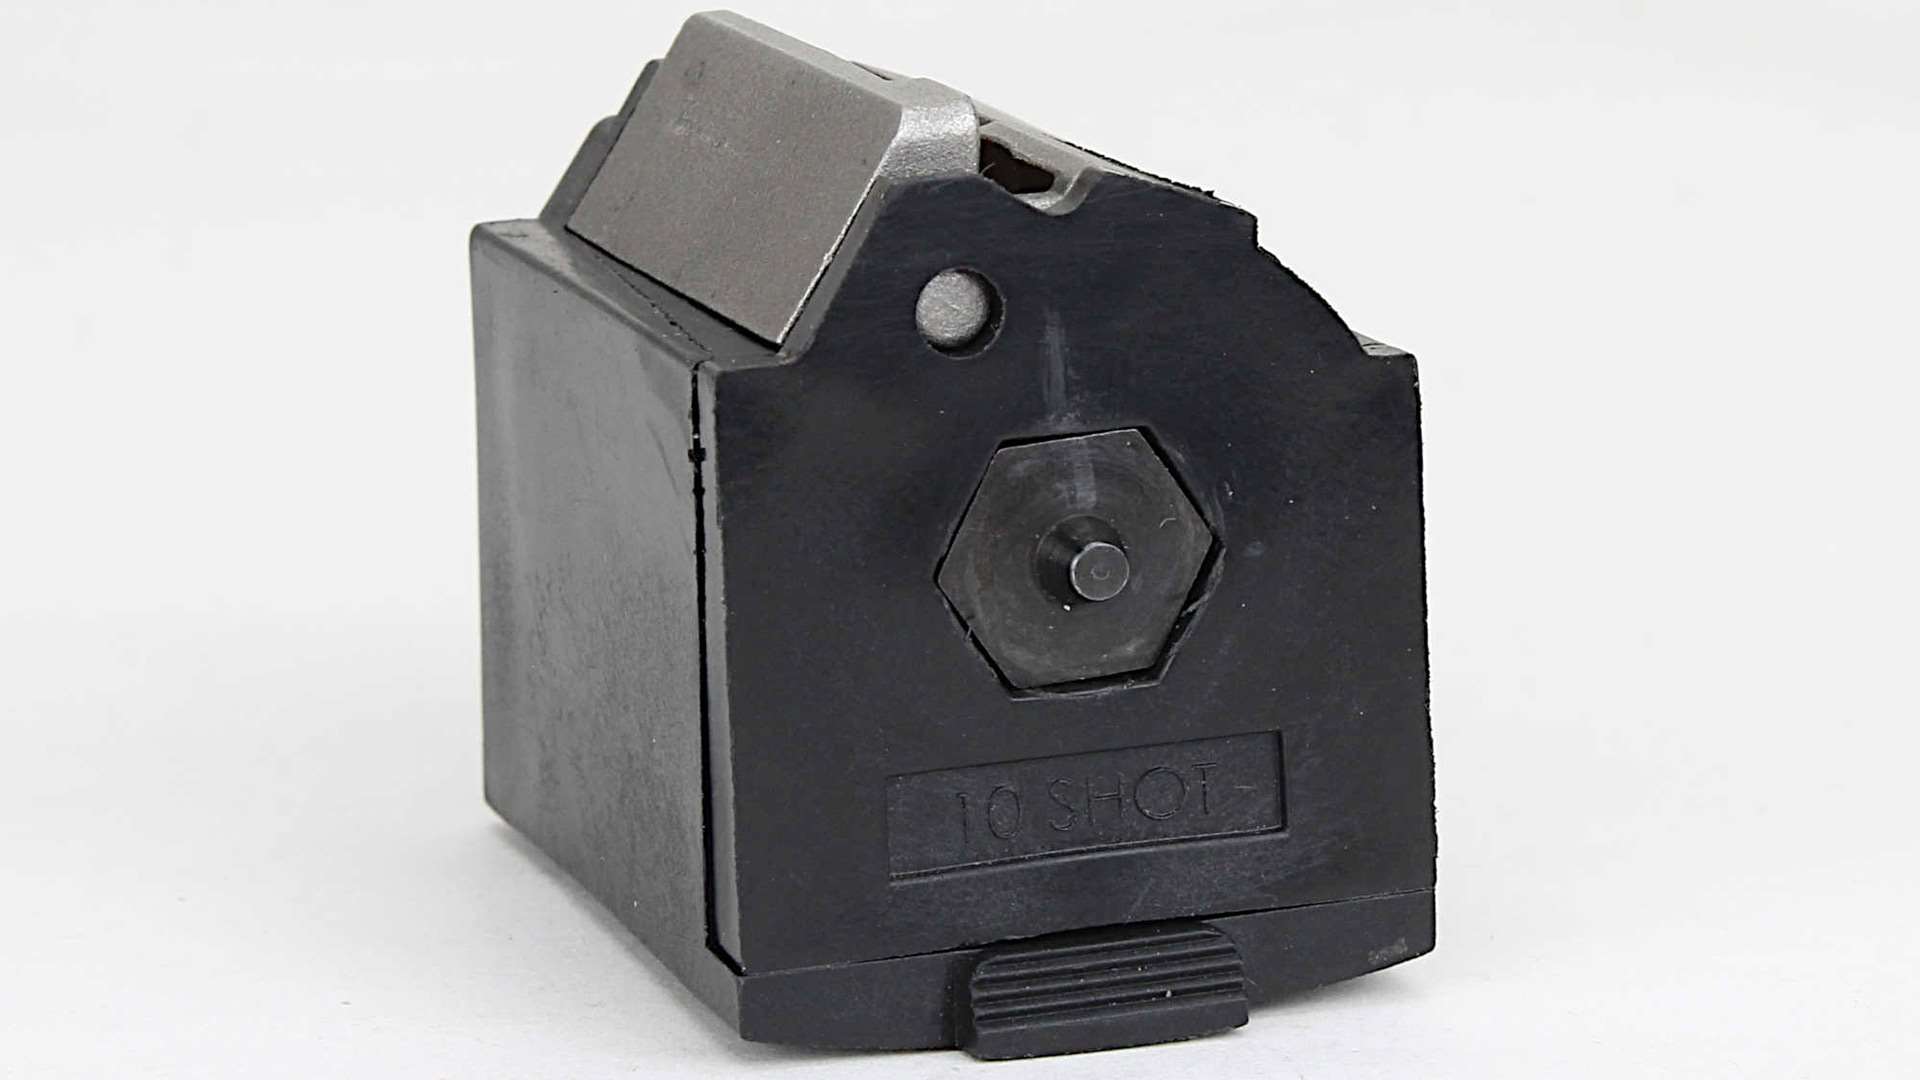
To disassemble the 10/22 rotary magazine, use a 9/64 hex wrench to loosen the cap nut screw at the front of the mag. On the back of the mag is a hex-shaped cap nut. Hold thumb pressure against it as you remove the cap nut screw and allow the back plate with cap nut to rotate counterclockwise under spring pressure. When the pressure is relieved, you’ll find the 10/22 rotary magazine disassembles into seven component parts, including a captive rotor spring. You can remove the rotor spring too, but this isn’t necessary for routine cleaning.

To reassemble the magazine, replace the feed lips assembly onto the magazine body. It has raised, round nubs (keys) of dissimilar size on each end, so it fits back together only one way and you can’t get it wrong. Hold it in place with a finger and drop the rotor into the magazine body with the protruding spring end up. That red rotor looks somewhat like a gear with teeth. One of these "teeth" is longer than the others and serves as a stop when it bumps against the feed lip assembly. Turn the rotor clockwise so that the stop rests against the feed lips assembly. Then replace the back plate.
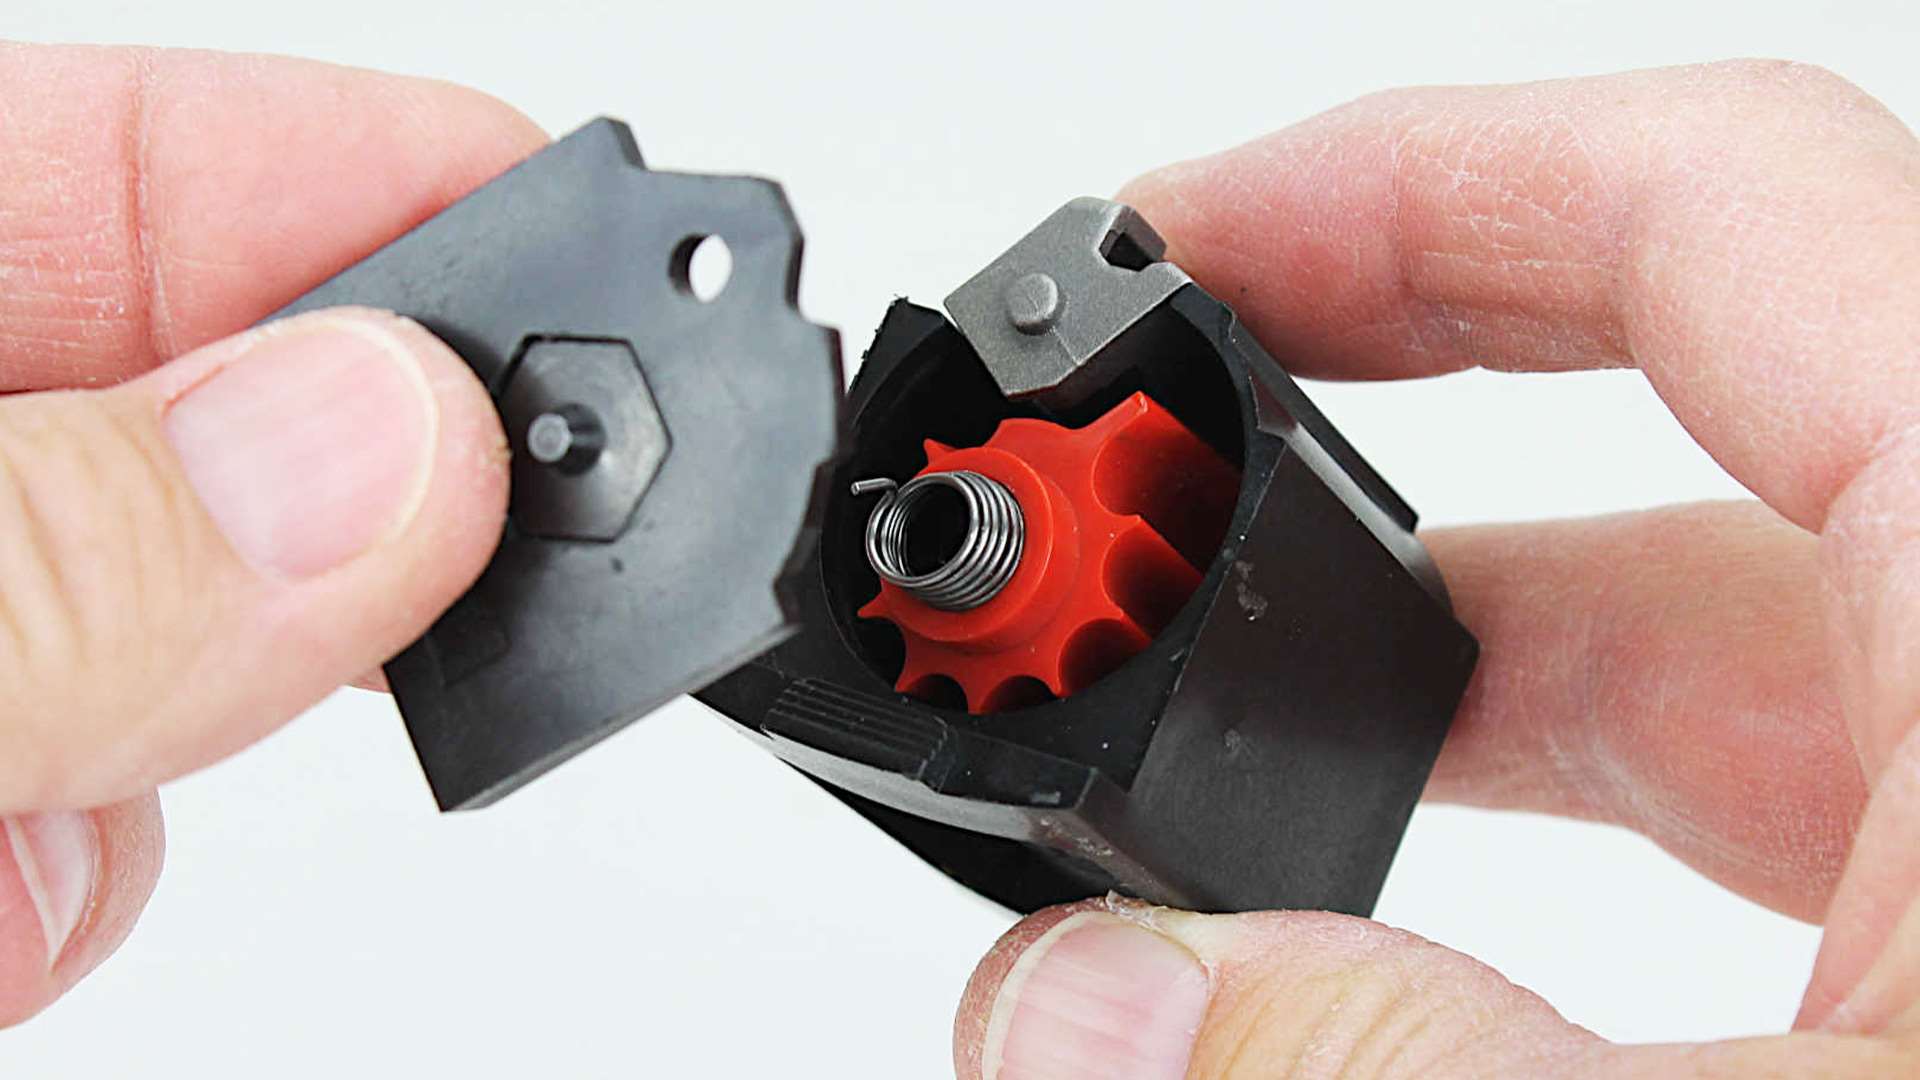
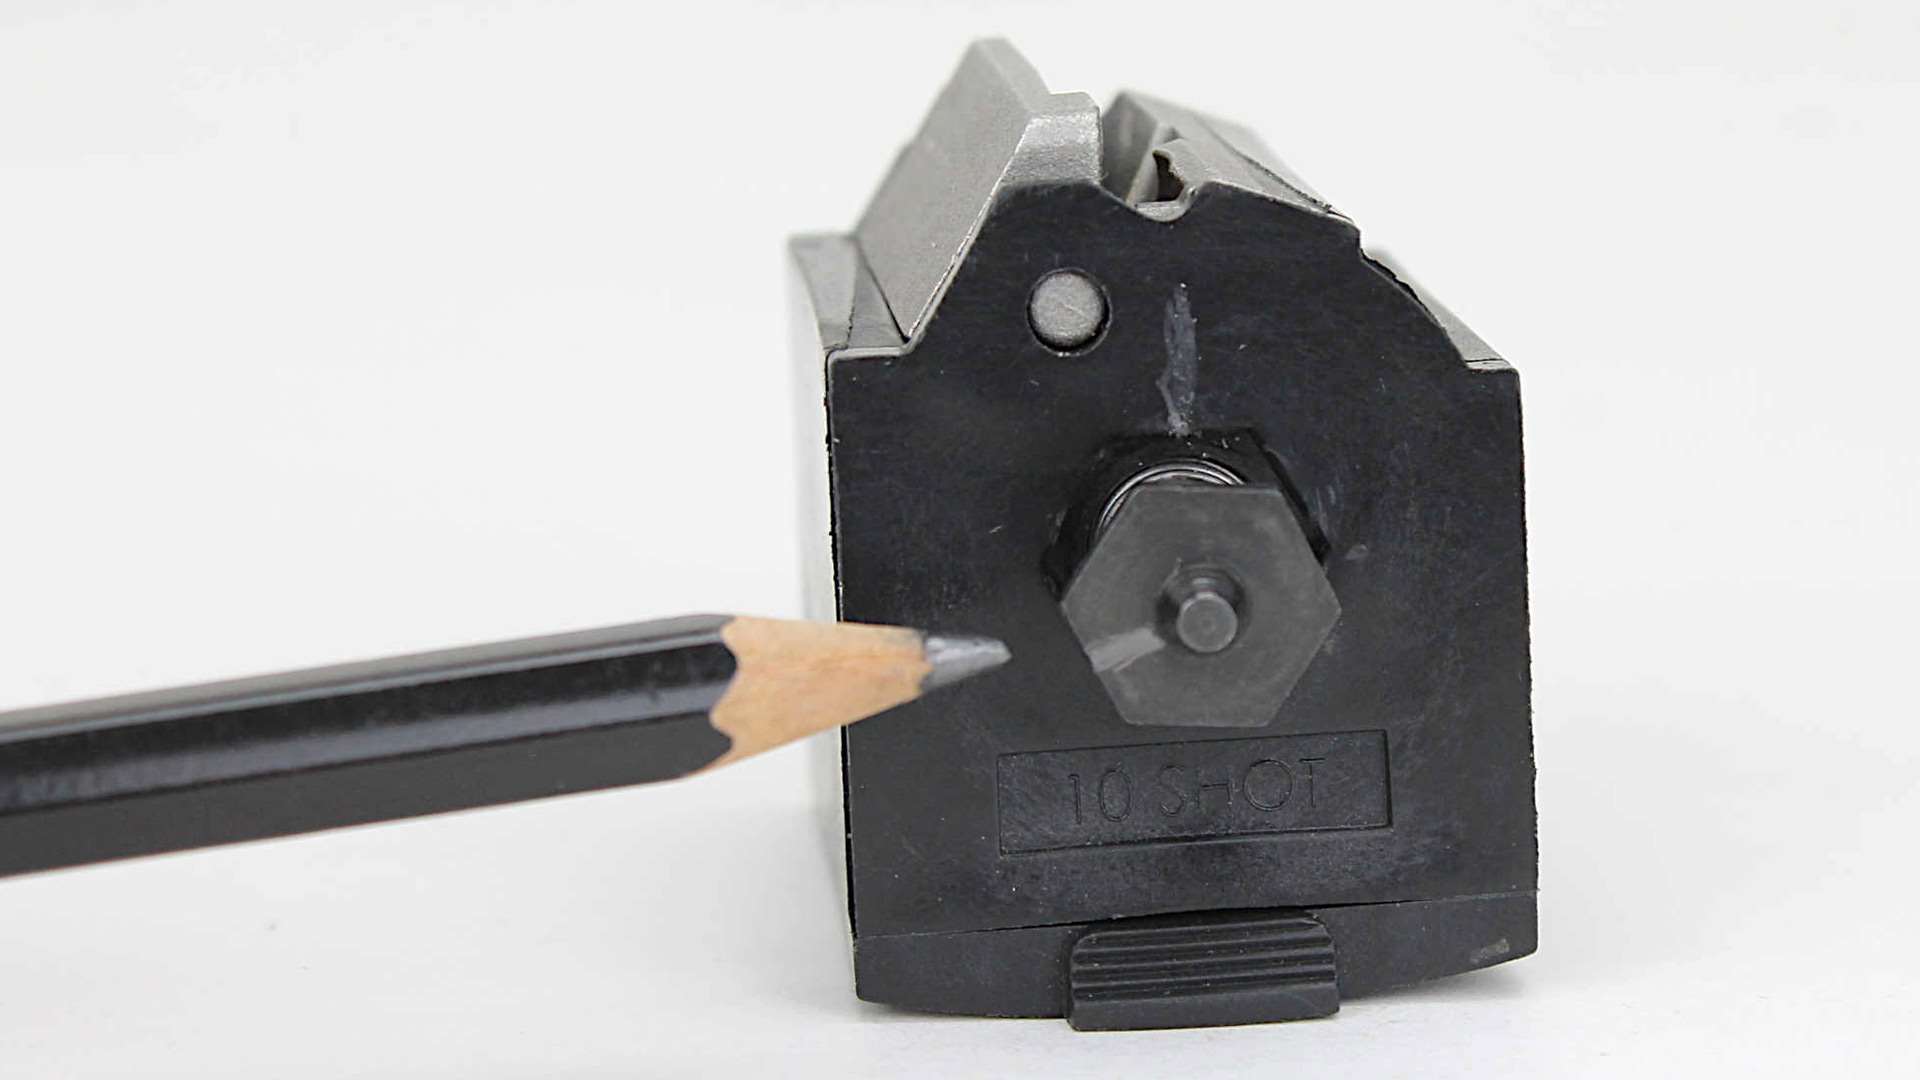
The hexagon-shaped cap nut has a tiny receptacle hole to capture the end of the rotor spring. This is what winds tension onto the spring as you rotate the cap nut with the rotor stop up against the feed lips assembly. Insert the spring end into the cap nut’s receptacle and turn the cap nut with finger pressure until you feel the rotor’s stop contact the feed lips assembly, if it’s moved. From this point, using one of the flat hexagon edges as reference, that edge must be turned clockwise against spring pressure for the distance of exactly 8 corresponding flat edges in the back plate. This is one full turn, plus the distance of two additional flat edges, or one and one-third turns. The cap nut takes a 7/16-inch wrench.
A visual aid can be a big help. Make a pencil mark on one of the cap nut’s flat edges and watch it as you count it pass seven flat edges in the back plate to align with the eighth flat edge (1⅓ turns). Push the cap nut down into place and hold it with thumb pressure as you insert and tighten the cap nut screw.
Nifty Tools
All easier said than done, as it can be difficult to simultaneously hold the back plate in place while also turning the cap nut against spring pressure with a 7/16-inch wrench and then snap the nut into its recess. Under increasing spring pressure, the cap nut tends to slip out from the wrench as you turn it, or it jumps free, unwinding the spring, as it transitions any gap between wrench and recess.
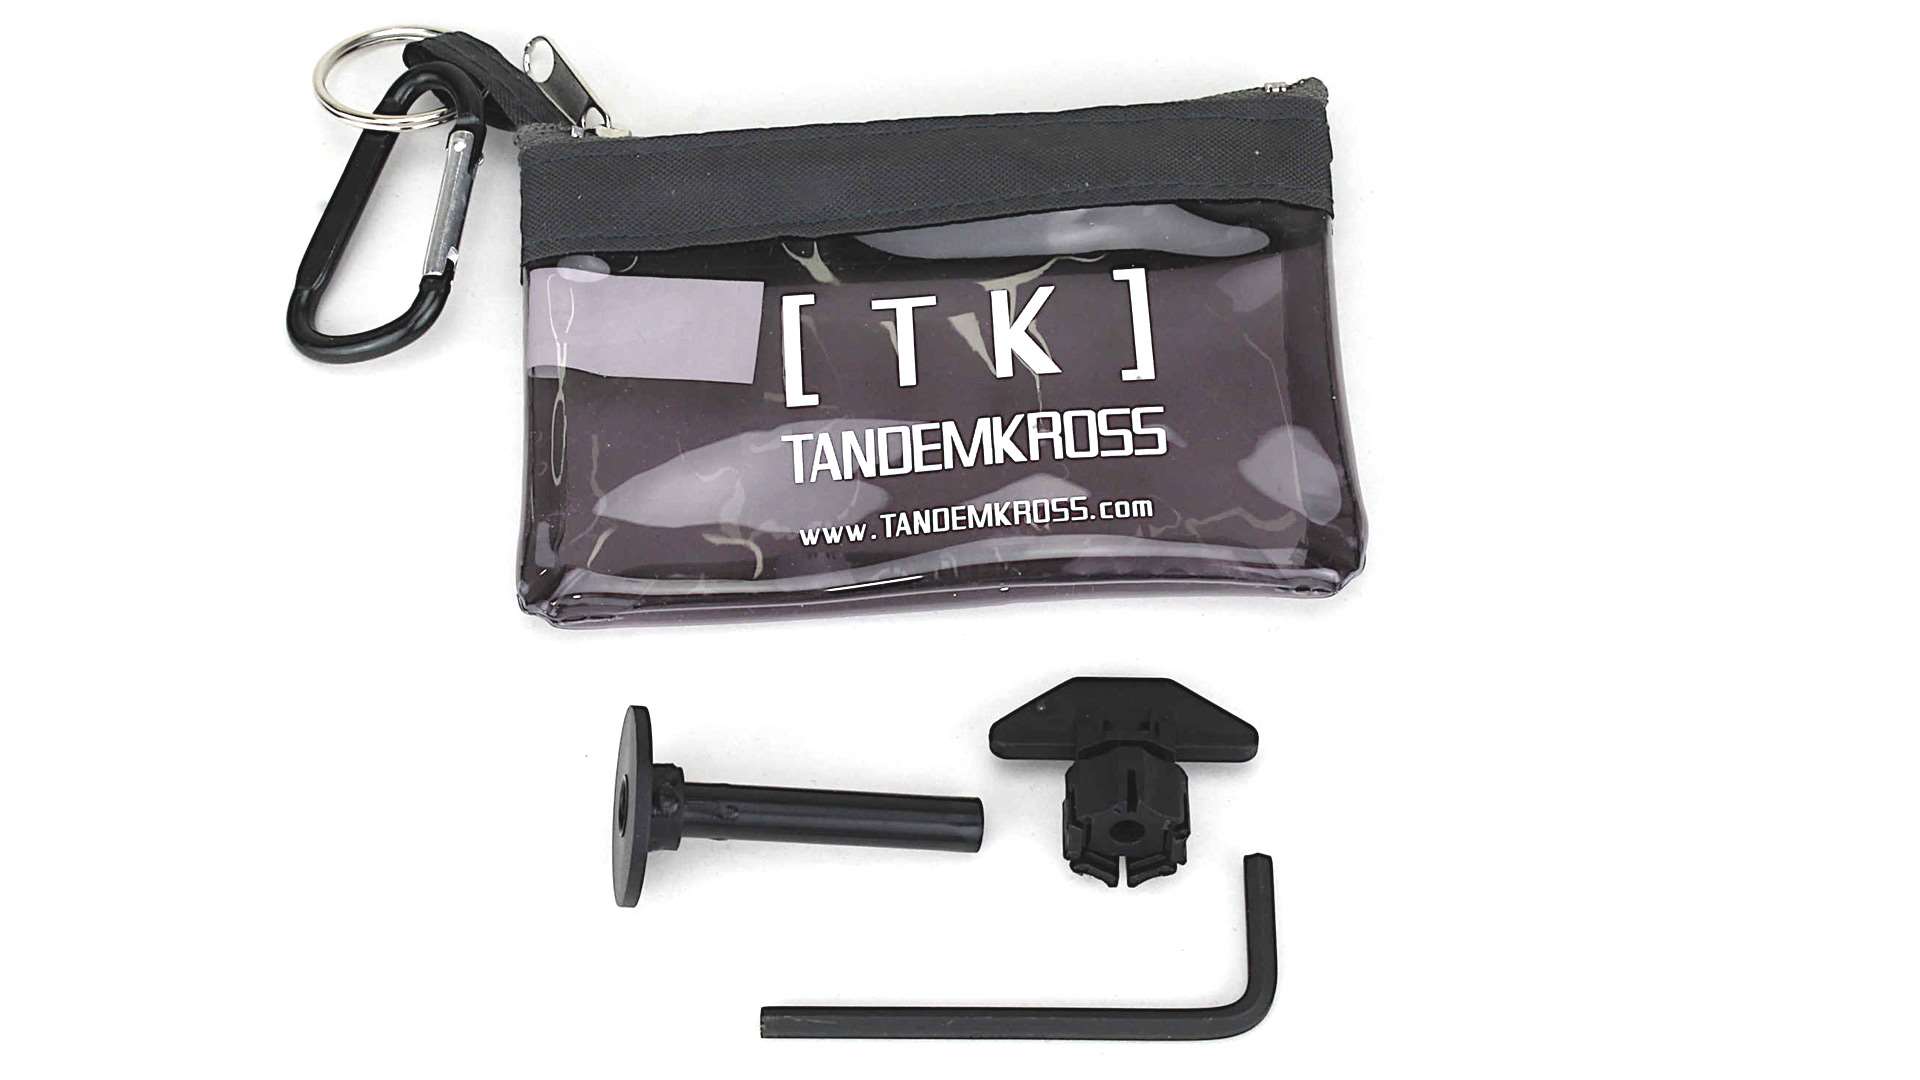
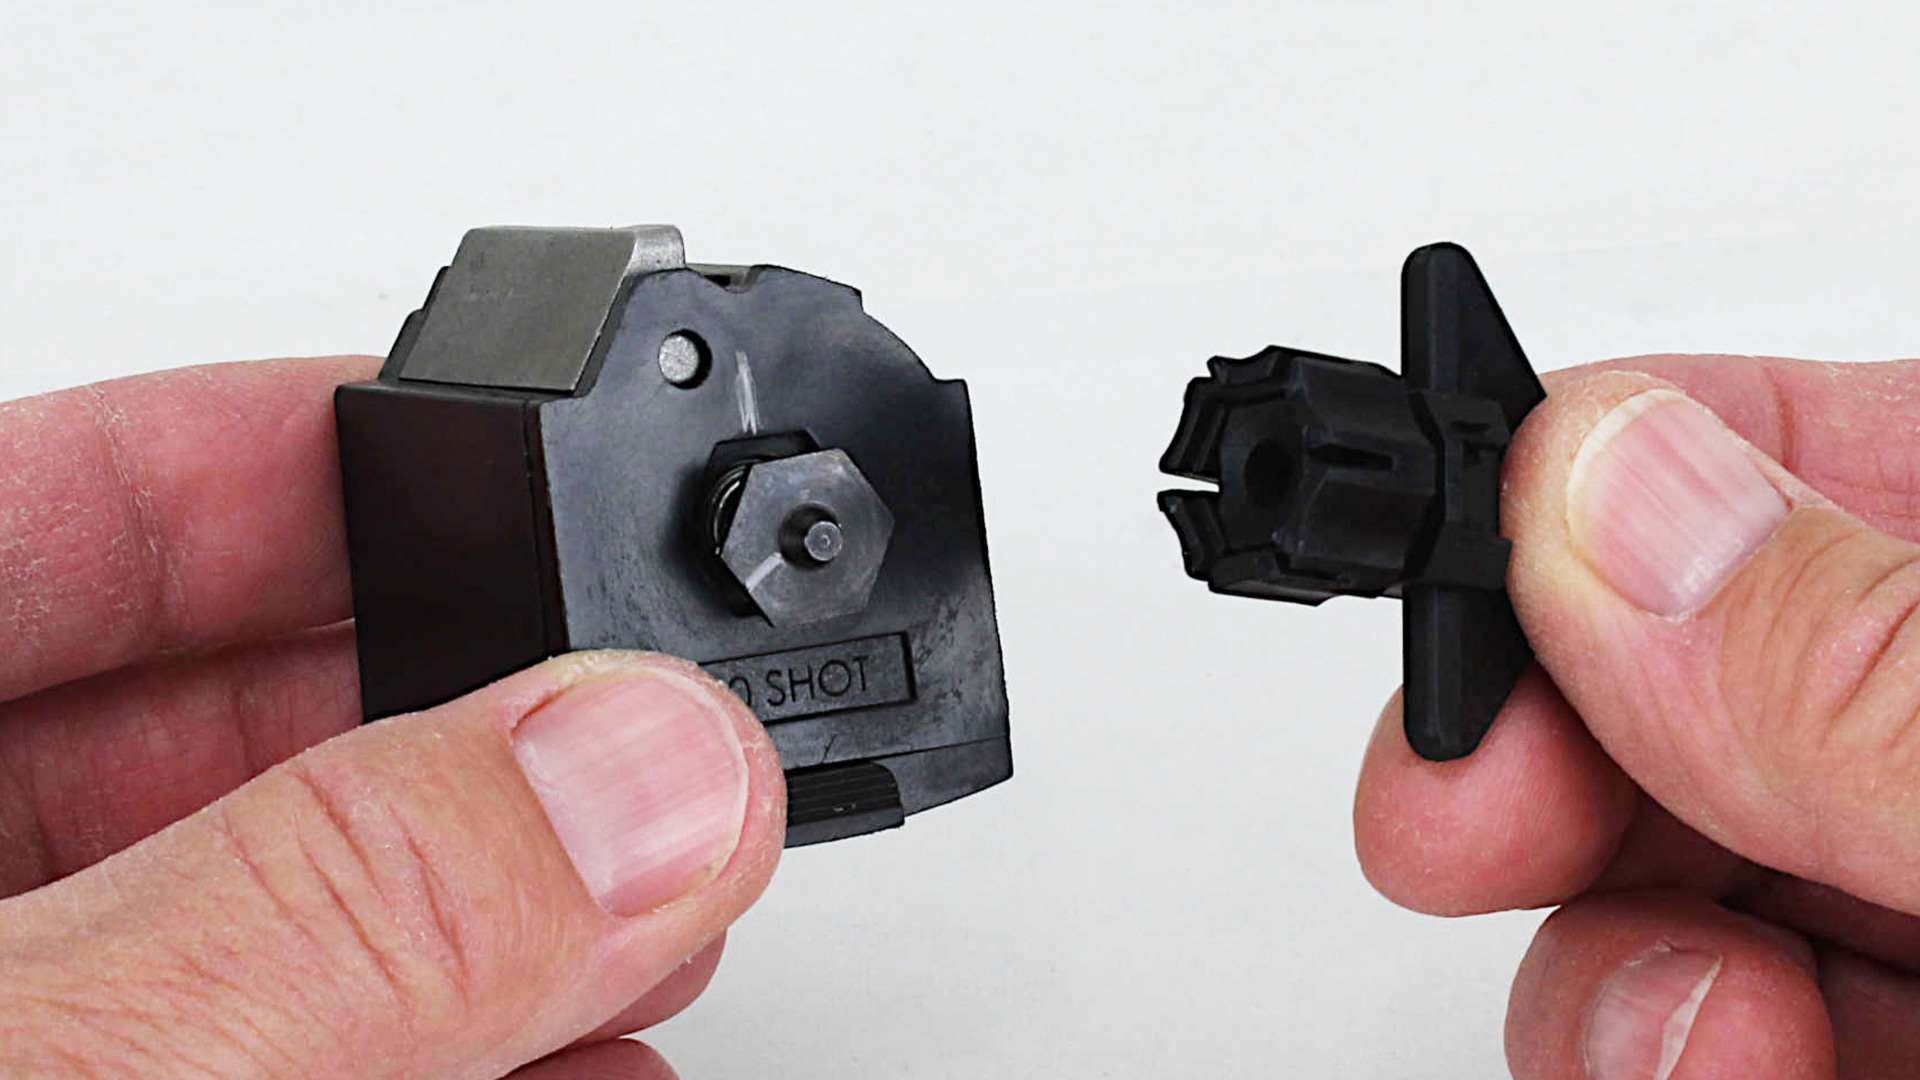
Those folks at Tandemkross, makers of innovative accessories and tools for rimfire competitive shooters, have obviously struggled with the Ruger 10/22 rotary magazines themselves. Following the axiom that frustration is the real mother of invention, someone there has found an easier way to reassemble the magazine. The Tandemkross Mag Tuner and Assembly Tool is actually a three-piece tool kit consisting of a synthetic cap nut tool, a synthetic reassembly assist tool and a standard 9/64 hex wrench. The kit comes in a zippered plastic pouch to keep the pieces together. An attached key ring and small carabiner permits attaching the pouch to whatever you want.
With the Tandemkross kit, insert the reassembly assist tool through the front of the magazine body and drop the rotor onto it. Replace the back plate. Use the Tandemkross cap nut tool to hold the cap nut captive as you withdraw the reassembly assist tool from the magazine body.
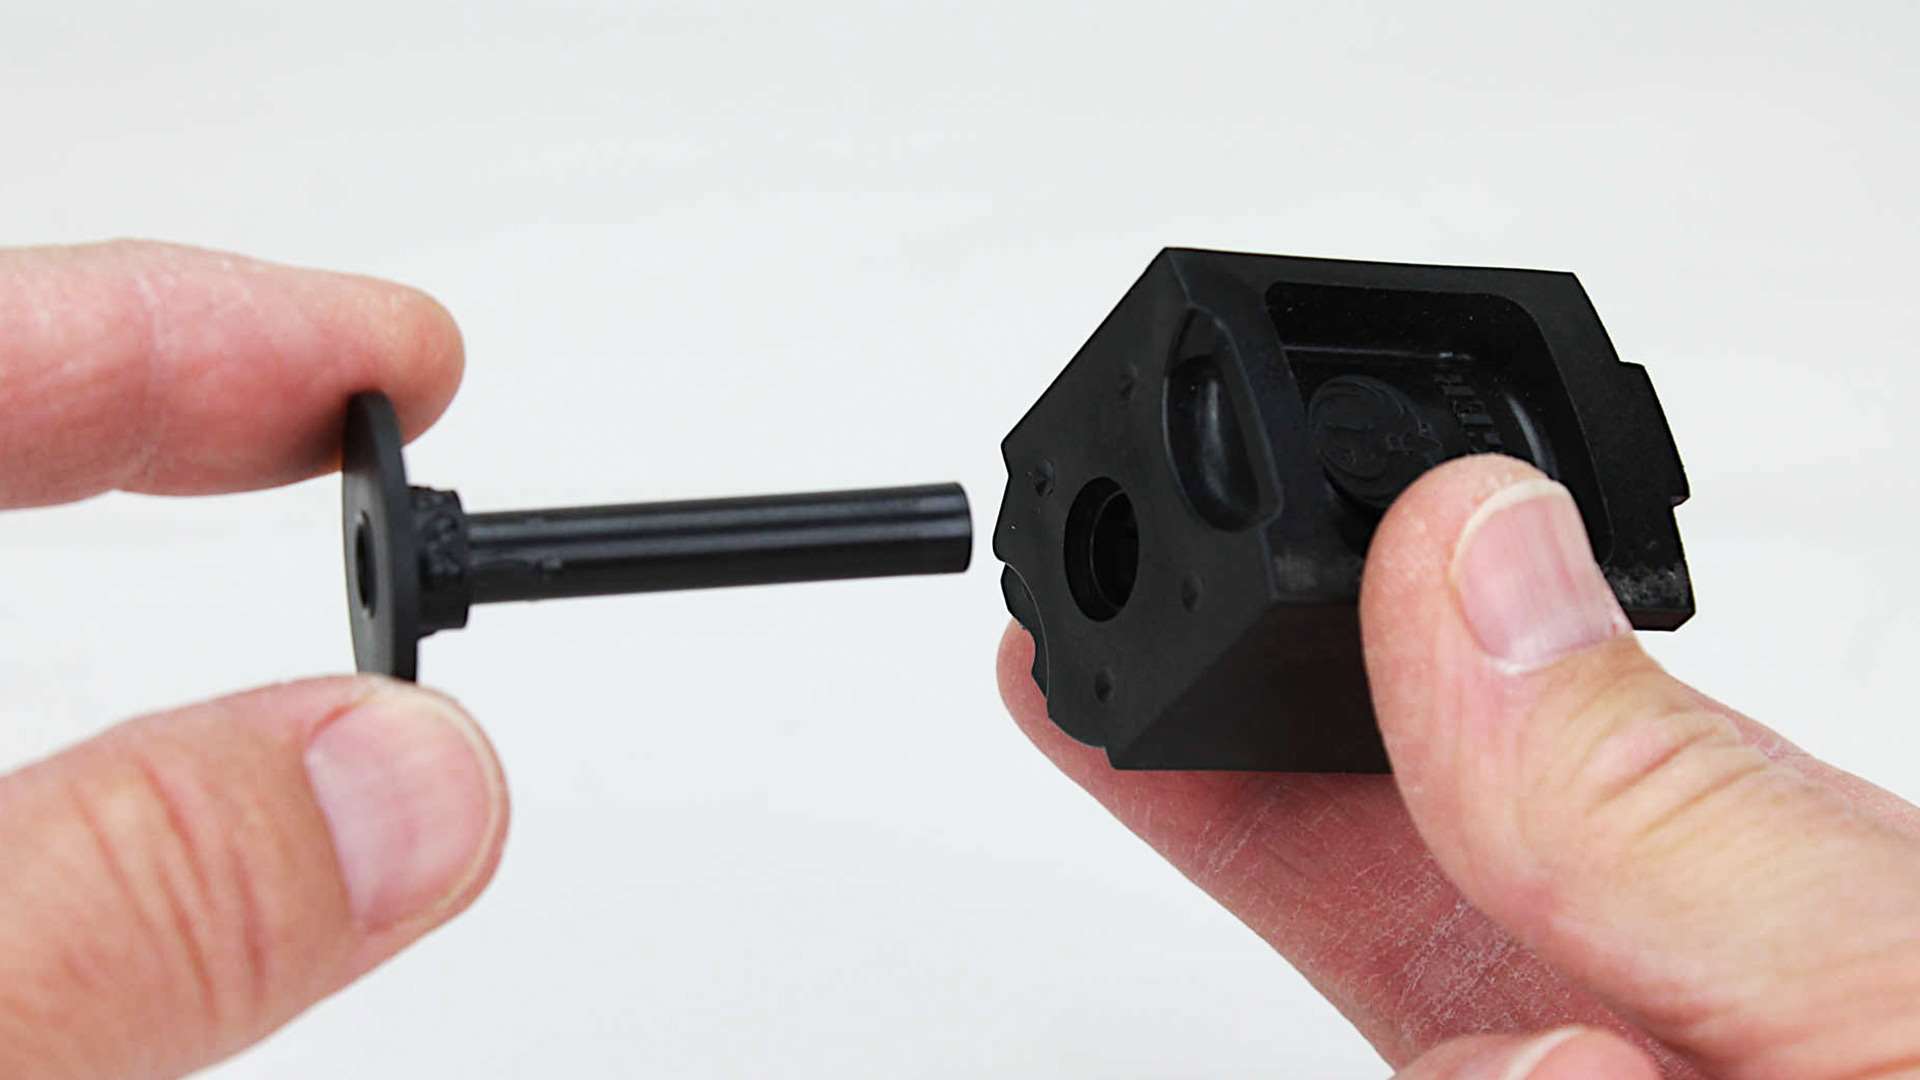
Turn the cap nut one and one-third turns (eight flats), then push the spring-loaded tool handle down to snap the cap nut down into its recess. Remove the tool then hold the cap nut in place with your thumb as you insert and tighten the cap nut screw.
Note that you can use the cap nut tool’s handle as a visual reference, too. Put a pencil mark at the back plate’s 12 o’clock hexagonal flat edge position. With the rotor stop contacting the feed lips assembly, count two hexagonal flats on the cap nut counterclockwise from 12 o’clock (at about the 8 o’clock position) and mark it with the pencil—this is the flat you want to end up at 12 o’clock for proper spring tension.
Attach the cap nut tool so that one of its handles overhangs the marked cap nut flat, turn the tool a full one and one-third revolutions until that handle is at 12 o’clock and snap the cap nut into its recess. If the pencil marks are aligned, you did it correctly.
There’s an excellent three-minute video on the Tandemkross website that clearly illustrates use of the tool kit.
You don’t have to buy the tool kit to view the procedure, but if you do, you may end up buying one because the low $14.99 price is worth the cost of frustration lost and confidence gained in keeping those rotary mags operating perfectly.
Read more: 2 Great Tools For The Ruger 10/22
Most Popular