Are you struggling with your draw? Often, the draw is one of the first gun handling skills that people start to train for, after they start having some success with their shooting fundamentals. Not only is the draw a potential life-saving skill, it is a fun and rewarding skill to practice and train. Achieving a draw that is capable of delivering an accurate shot in less than one second is a standard that many wish to attain—yet it eludes many of us.
In my classes and online lessons, the draw is often a topic of conversation. It is not uncommon for students of mine to be faster in their draw with just a bit of training and guidance. Often, several students hit their first sub-one-second draw in our class.
There are several common mistakes people make when drawing a gun that hinders their progress, and this article will discuss them. This is a result of working with thousands of people over the years and observing them carefully. My experience is your shortcut, so use it wisely.
MISTAKE 1: YOU’RE NOT REACTING IMMEDIATELY TO THE STIMULUS
For the purpose of training and/or competitive shooting, the “stimulus” is usually an auditory beep. However, the stimulus could be visual or something else, depending on the situation. For instance, in a defensive encounter the stimulus could be an attacker charging at you, or going to draw a firearm of their own. In either event, you want to react to this fast and without hesitation. Using the beep of a shot timer as an example (here is one example of such a timer), the length of the actual “start” beep is 0.3 to 0.4 seconds long. Considering most human response time is around 0.2 seconds or so, we should see people starting to move before the beep is completed. However, often times I see people reacting after the beep is done. In this instance, you’ve already given several tenths-of-a-second away for free. This is time someone else owns—don’t let that happen.
Solution: Focus your attention on reacting to the “B” in “Beep.” This will help you be ready to respond instantly. To practice your reaction time, check out a recent Instagram post I made here.
MISTAKE 2: BOTH HANDS ARE NOT MOVING AT THE SAME TIME
This could potentially slow you down and result in bad hits or misses on target. What I typically see is that the firing hand moves quickly, but the support hand is behind the curve. Some people don’t even move their support hand until the firing hand is bringing the gun to target. This causes the support hand to be on the gun late and usually disturbs the gun some way as it starts to apply pressure, if that pressure is even ready at all. Usually because the support hand is late on the gun, this also causes a “grip check” issue.
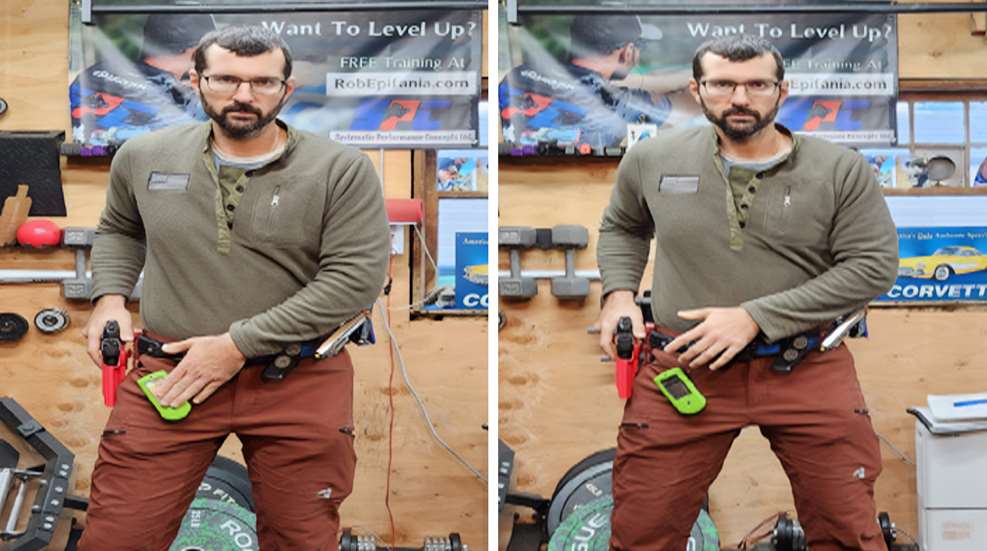
Solution: Both hands move immediatley and in sync. I typically recommend the support hand thumb portion of the palm touches right around the belly button. This allows the support hand to get on the gun immediately and start forming pressure quickly. If drawing from concealment, the support hand has to clear the garment to access the gun. As soon as the gun is accessed, the support hand goes immediately to this spot. Take a look at the Instagram link above to see this in action as well.
MISTAKE 3: GRIP CHECK BEFORE SHOOTING
You will see this most often when people start to shoot more than one shot at a target. I’ll see people run a draw at a good speed for one shot, but then when asked to deliver two or more shots to the same target, their draw is automatically 0.2 to 0.3 seconds slower. Why? Because they are performing what I call a “grip check.” A grip check is when the person gets the gun on target and has everything they need to shoot, except their mind doesn’t know if they are ready to handle recoil. Their mind goes, “Is my grip good enough to handle multiple shots?” If the answer is yes, then they shoot. That decision-making process costs 0.2 to 0.3 seconds.
Solution: Have your grip ready before the gun is even on target. If you haven’t read the article on the presentation process, now is the time to check it out. By performing these steps as the gun goes out to target, I find that my grip is complete and ready to shoot full speed at about 50 to 60 percent of travel. At this point, all I’m waiting for is to see whatever I’ve chosen to see in terms of confirmation. Once it’s there, I fire without hesitation or delay. I call this “predictable and immediate.” You can see this in action here.
MISTAKE 4: NOT MOVING FAST ENOUGH
This would almost seem self-evident, but many people I’ve trained just don’t move fast enough. It’s common for people, especially when a more difficult target is involved, to draw slower. They think by drawing slower they get more precision out of the draw. This is totally false. At a minimum, your draw speed should always remain the same. I do it slightly different however and will explain below.
Solution: Simply speed up your hand speed. Remember, this is like driving a car. There has to be an acceleration and a deceleration to a relatively precise stopping point. The better your brakes (muscles and strength coordination) and the driver (nerve connections through training), the further you can push at a higher speed and still stop precisely. Use something like an 80 to 90 percent push to a 10 to 20 percent “brake” to start and work from there.
Also, the harder the target, the faster I try to draw. The reasoning behind this is that the harder the target is, the more you will choose to see before you shoot—so if the gun moves around a little more, you will be cleaning that up anyway. For easier targets, I focus on reacting fast and getting the gun in two hands fast to allow a predictable and immediate presentation.
MISTAKE 5: NOT GIVING YOURSELF PERMISSION TO FAIL AND MAKING THE TARGET TOO DIFFICULT TO SUCCEED WITH
Many times in the shooting community we want zero misses. After all, we are liable and accountable for every round we send downrange, right? While that is true and important especially in the personal protection and tactical worlds, it doesn’t truly allow for the growth that needs to happen through struggle and temporary failure. I spent a lot of time taking courses like this as a student, and while you will get somewhat proficient with this type of training, it won’t help you reach the upper echelon of performance. You need to bump up against struggles, challenges and obstacles to grow. It is both essential and necessary.
Once you learn to embrace new problems as success from previous ones, your growth can truly become limitless. This doesn’t mean there isn’t a time for tests—just that training and tests have a different set of rules to abide by. Tests are meant to show your performance under pressure and training is meant to challenge and stretch the limits. They are both necessary parts of a proper training program and, if used correctly and effectively, they enhance real world performance.
Solution: I usually start working with students at the three-year mark with a piece of printer paper as the target (previously in class we have been shooting anything from a three-by-five to one-inch dots) when we do our draw drill. This removes some of the inhibitions to drawing and shooting a shot quickly. We usually get the student down to a time that they’re “challenged” at. This means that they are consistently getting a quick time in relation to their skill level, but having some accuracy issues at this point. I observe while paying attention to the times and the hits. Usually there is some glaring obstacle related to the points above. When we start to solve for these variables, we get better times and get the hits to start to tighten up. This process continued after the class or through subsequent classes or training has a compounding affect that allows the student to keep progressing.
On your next range trip or dry-fire session, take a quick read on these and see if you can pick out which you are doing (if any). There will be a positive effect on your performance as you work these tips into your shooting (or drawing) toolbox.
Article from the January/February 2024 issue of USPSA’s magazine.


