Read Part 1 of Glen Zediker’s “Reloading at the Range” series.
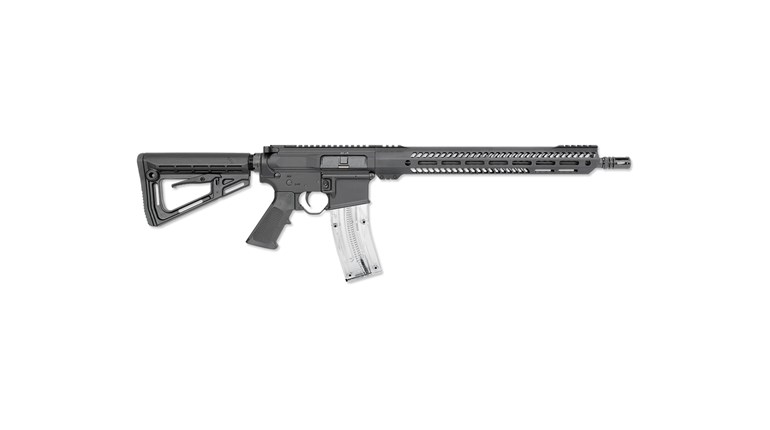
If you’re a handloader, part of the excitement of getting a new rifle, or opening a box of new bullets, or canister of the latest propellant is taking on the task of finding out how good it can get. Whether this task is a chore or joy, of course, varies with each of us. Either way, focusing your approach by having a plan sure makes it go faster. That usually means better.
There are a number of good loading manuals. Most are done either by bullet or propellant manufacturers. Nowadays there’s a lot more loading data available via magazines and online. Study enough of it and it’s plain that agreement amongst all those references is unusual. The reason for that is, because of differences in components and equipment and also in testing conditions or circumstances; the more things that might be different, the more their influences either compound or offset to influence results. Published data serves me mostly by establishing an idea of what to anticipate at a bullet velocity and charge weight. That’s an important function.
Pay close attention to the details in any published data. Case and primer brand, barrel length, and bullet seating depth (indicated by cartridge overall length), strongly influence results. The closer your set is to that of the tester who gathered the data, the closer results you can expect. However! That’s not really what this article is about. Eventually, if not by choice, we all end up writing our own loading manuals.
Variables
Cartridge variables include propellant, bullet, primer and case, with an increasingly escalating number of combinations that can be introduced through fine tuning—bullet seating depth, for one example. It is important to reduce variables to a minimum to get accurate feedback from testing.
Given that, I’m going to focus on propellant charge for this article. Take this information, apply another variable, and the testing process stays essentially the same.
Before going further, I feel the need to point out something that may not be as obvious as it should be. Knowing what we’re looking for prior to testing sure helps! No trip can end without a way of knowing when you’ve gotten there. I approach every load experiment with the idea that it’s what I need to take with me to the next event. Knowing the speed potential (from experience and feedback) and respecting some realism in accuracy goals, you can then get to work and see where different trips take you. That’s the plan and the road map. Still, though, you need to know when you’re there. For me it’s tight groups and no quirky behaviors. I especially don’t like pressure problems.
Keeping it safe
It’s best to do load testing with new brass. The reason is that it gives a better indication of pressure than a reused case will. In most rifle chambers, initial expansion in new brass is measurably greater than on subsequent firings. It’s going to be the primer pocket that tells the most. Some shooters measure case head expansion, but it’s easy to gauge by feeling how the primers seat into the resized cases. That’s the direct effect of expansion and a telling clue. If the primer enters the pocket more easily than normal, that’s a good indication that the load is running hot. It’s a subjective evaluation, and there has to be something to compare it to. That comes only from experience.

Judging fired primer condition is another common means to gauge load pressure. I habitually look at the spent primer on each case during testing. Not all combinations clearly reveal the visible clues we watch for: Excessive flattening, cratered surface, or cracks. That seems to depend, a lot, on the primer brand. Generally, small rifle primers may not show as much change as large rifle primers, or won’t until pressure levels are comparatively higher. I will say that if you see anything that looks like an over-pressure symptom shown in a primer, you better believe it’s telling the truth. In a load that’s not over-pressure, there should be a radius on the edge of a fired primer (center cartridge in Photo 1 above).
Other clues to excessive pressure are case head damage, usually seen in marks or impressions left behind. Seeing an impression left behind by the ejector, for instance, tells that the case was very forcibly driven back against the bolt face. This, again, can vary from rifle to rifle, but it’s in knowing what is “normal” from your combination that brings up the question.
Usually, though, the best immediate indication is bullet velocity. A chronograph really needs to be part of any testing tool set. It’s the only way most of us can get numbers that suggest load pressures. If you’re seeing more speed than “everyone” claims to get, you best be backing off. Do not, however, assume that the combination you’re testing is pressure-safe just because you’re not seeing as much speed as you think you should. That’s the one that can bite back. There are a slew of reasons that some combinations may hit a pressure ceiling before they reach the speed goal.
Taking it to the target
For NRA High Power Rifle, I do load work-ups at 300 yards, unless it’s a 200-yard load. Testing ultimately gets done over the distance the load is destined for and adjusted as needed.
The “Audette Method,” named for the late Creighton Audette, can work well to get things started. Many call it “incremental load development.” It’s easy to find detailed treatments of this process, so I’ll just overview it here. The sole variable is the propellant charge. Proceed in 0.20- to 0.30-grain increments upward and put these into a target, and this should be done on the same target. Oh, and important: Establish a starting and stopping point for the charge weight. It will be a narrower range with a faster-burning propellant in a smaller-capacity case.
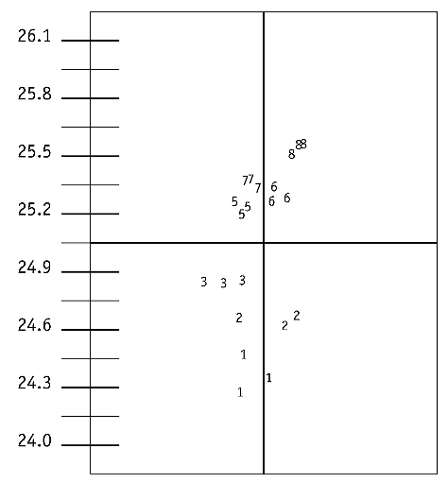
Creighton did this one round at a time, but let’s go ahead and shoot three per step. As the propellant charge increases, impacts on the target should get a little higher and there will be points along the test that show tighter groupings. There ideally will also be a stretch where accuracy and elevation of a few sequential workups are coinciding: all the groups are small and contained in close vertical proximity (shots 5 through 7 in Photo 2).
Creighton said that pressure symptoms define the upper limit, of course, and that looking back “down,” as it were, on the progress of the incremental build up there will be an area where impact clusters are similar and pressures are workable. Hopefully there will be at least two charge increments represented, more is better. If it’s showing this, then choosing something from that sector gets a load that’s accurate (number one) and not “sensitive” (number two), meaning that variations in temperatures and so on aren’t likely to push it over pressure or mutate its accuracy. That, again, is shown by seeing vertical consistency over more than one incremental workup. Choose an upper, lower, or middle representative from this cluster. The upper-middle usually appeals to me.
That method sounds reasonable, and it is. By my experience it doesn’t always work with every propellant, but it’s something concrete to follow. If it doesn’t “work,” then the next test should be with another propellant. It’s easy to modify such a method by going up in bigger steps, and fewer of them of course. Any incremental test should, at the least, show a step or two that deserves further pursuit. At that point, my test groups increase to 10 shots. No kidding, you can wear out a rifle barrel testing. At the least, though, I want to see consistent performance over at least two 10-shot groups with any load, before leaving the range. If there’s an idea in mind that I might come back and try it again, then I will. I might also want to try a bullet seating depth experiment. I’ve usually settled on a primer, case and, of course, bullet. Those things can be the focus of another trip. Just keep it fair (to yourself) by staying in control of variables, and that means introducing one at a time.
Saving time and trouble
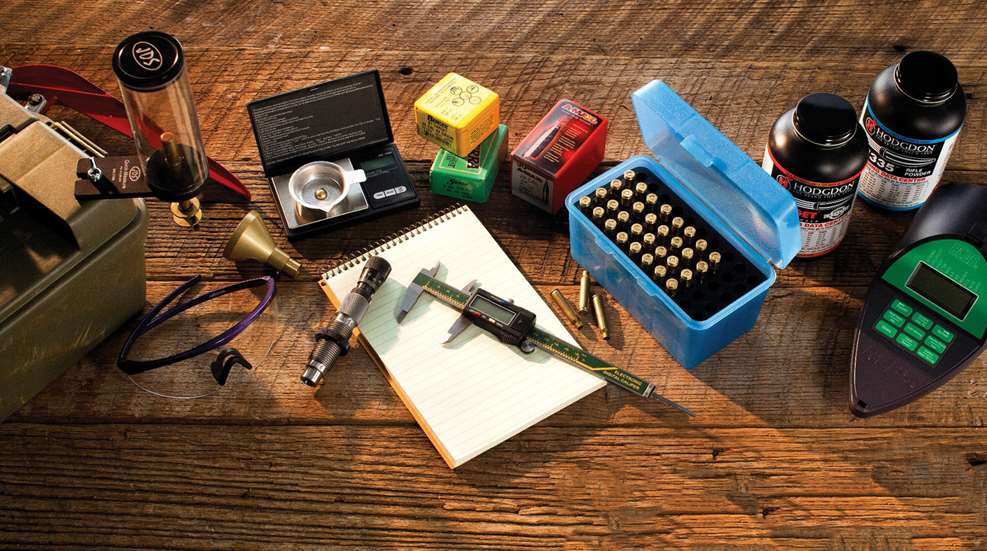
As covered in Part 1, I do workups at the range, and by that I mean I load the cartridges right there. It’s not hard to put together a “portable” loading tool set, and it’s even easier to use. I take a cartridge carrier full of primed cases, the propellants I’ll test, and a seating die threaded into a small press. I C-clamp the press and meter to the bench, table or tailgate. Write down the meter setting along with what the propellant charge weight “should” be, and retain a loaded cartridge from each promising result to take back home for a double-check. Write everything down!
Being happy
We are always testing ammunition. It’s called “match shooting.” Developing and maintaining a “control load,” honestly, is the goal. That load is the one you’re staking your score on right now. It sounds cool to call it a control, and “scientifically” I guess it is, but it’s really the last best result of testing. We all want to beat it, of course, and that’s what the experiments are about. Likewise, sometimes the idea is to adjust the control load to work with a different rifle. That’s easy, usually. Back it off a full grain and move forward from there. Another thing we might want to do is try a different primer with it, or bullet, and the same advice holds true—back off a grain to start (a half-grain is okay with a bullet change, if the bullet is the same weight). One thing I always do, as mentioned but not hammered on, is shoot that control straight away with what I tested (if I liked the result of the test).
Different days give different results with any ammunition, but ultimately the control load is the one that performs the best, day in and day out. I judge loads by the worst group I see, not the best. I’m always looking for the best worst group, and I hope that makes sense. Keep looking, but don’t be afraid to say it truly is the end of the road, and be happy where you are.
Most Popular