The sitting position can be a valuable position to learn, for it is used in high power rifle and some smallbore shooting events in the United States. However, many shooting events do not include sitting and it is not recognized by some countries and international groups.
There are two different sitting positions that are commonly used and every shooter should choose one of them. There are advantages to each position, but your decision must be based on which position your body is best suited to use. With a properly chosen position, shooting sitting can be almost like shooting prone.
Step One: Study the Position
The two basic sitting positions are the closed sitting position (crossed legs) and the extended sitting position (crossed ankles).
The extended position can be used successfully by more shooters and is suited to shooters of average build or those with short arms and legs. The closed position is better for shooters with long arms and legs.
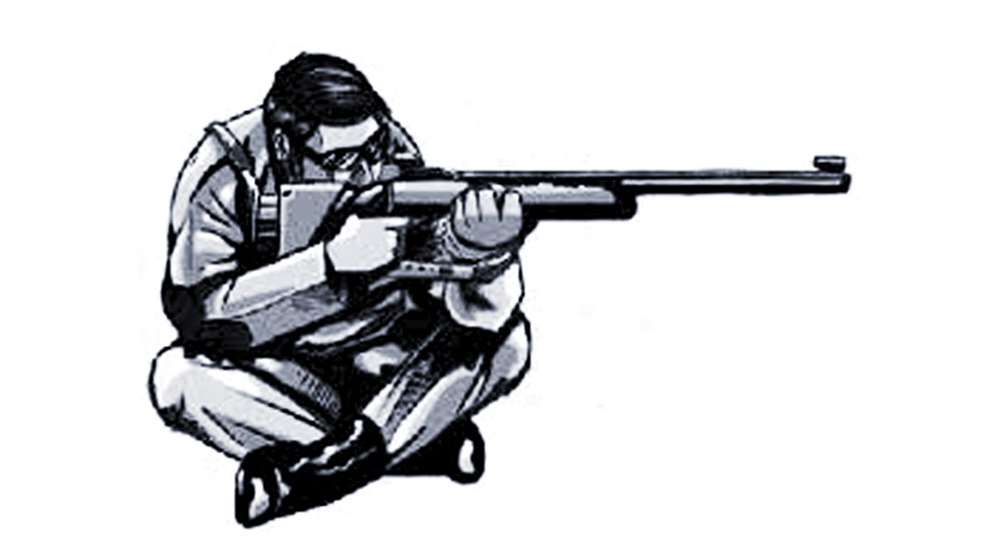
See the extended and closed sitting positions below. They are photos of rifle shooting legend Carl Bernosky from the 1980s.
Extended sitting position

- Body leans forward to rest on legs.
- Head position dropped down only slightly.
- Sling placed high on arm, supporting rifle.
- Legs crossed (left over right) and extended away from body.
- Legs relaxed. (No muscular tension used to hold legs up.)
- Elbows rest on legs below the knees.
- Body turned 30 degrees away from target.
Closed sitting position
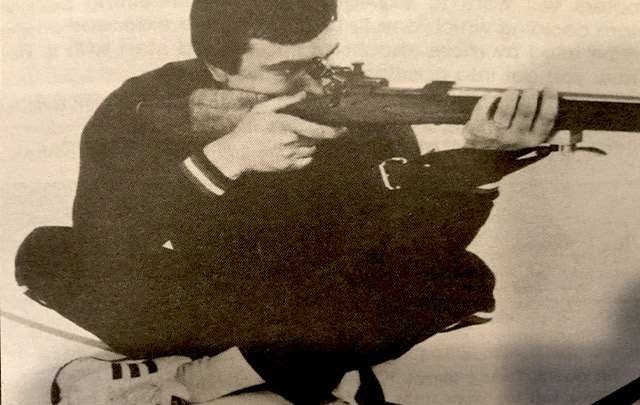
- Head dropped only slightly.
- Sling placed high on arm, supporting rifle.
- Legs crossed (left over right) and pulled in to body.
- Elbows rest on insides of knees.
- Body turned 45-60 degrees away from target.
- Body leans forward to rest on legs.
Additionally, next time you are at the range, study the position of some other advanced shooter. See if you can identify the position features outlined above.
Step Two: Practice the Body Position, Extended
Most shooters will want to experiment with both shooting positions before deciding which one to use. Since the extended position can be used by more shooters, you should start with it. Here is how you get into position.
- Sit down, facing about 30 degrees away from aiming area.
- Cross left leg over right leg.
- Right foot should lie on its side.
- Lower back part of left leg should rest on right ankle, left toe should point up.
- Bend forward with body and rest both elbows on legs below knees.
- Legs should relax down as far as they will comfortably go.
Step Three: Practice the Rifle Position, Extended
Next, get into the extended sitting position with a rifle, but without a sling. This step will do two things. It will help you find the proper location for your left hand and the sling swivel on the fore-end, and it will help you to decide whether the extended position is best for you or if you should try the closed position.
- Place rifle squarely in shoulder. Keep stock high enough for eyes to look straight ahead through sights comfortably.
- Raise or lower rifle by moving left hand forward and back until rifle barrel is level.
- Grasp pistol grip lightly with right hand.
- Mark location of V in left hand and move swivel back to V in hand if adjustable.
Optional Step Two: Practice the Body Position, Closed
If you are not satisfied with the way the extended sitting position feels to you, try the closed sitting position. Here is how you get into the closed position.
- Sit down facing 45-60 degrees away from aiming area.
- Cross left ankle over right ankle and pull crossed ankles in close to body.
- Bend forward with body and rest both elbows on insides of knees.
- Let weight of upper body rest on legs.
Optional Step Three: Practice the Rifle Position, Closed
Next, get into closed position with a rifle, but without a sling.
- Get into position with the rifle following the same steps as for the extended position.
- Find the proper location for the left hand, mark it and move the sling swivel to that point if adjustable.
If you try both sitting positions, you must choose the best one for you and stay with it. Usually, the best sitting position is the one that gives you the best head position. A good head position lets you look through the sights comfortably while still letting your legs relax down.
Step Four: Adjust the Sling
Proper sling adjustment is done the same way in both the extended and closed positions.
- Form a sling loop and put the sling high on the arm.
- Tighten the sling keeper.
- Put the rifle back into position with the sling loose.
- Tighten the sling until it supports the weight of the rifle. A properly adjusted sling is usually shorter in sitting than in prone or kneeling.
Step Five: Align the Position
When the sling is properly adjusted in sitting, a target may be hung and the position aligned so that it points naturally at the target. Perform a position alignment check.
- Get into position.
- Aim.
- Look down and let the body relax into its natural position.
- After a few seconds, look up and see if the position alignment needs changing.
- If the rifle is pointing to the left or right, turn the entire body and rifle, pivoting on the buttocks.
- If the rifle is pointing high, lower it by lengthening the sling and moving the sling swivel forward.
- Raise the rifle by shortening the sling and moving the sling swivel back.
As you adjust the sling in the sitting position, be sure to let your legs relax down so that they support the weight of your upper body without using leg muscles to hold them up. This is one of the most important points in good sitting position shooting.
Step Six: Shoot in Position
Firing a shot sitting should be almost the same as firing a shot prone. Be sure to let the weight of your upper body and rifle relax onto your legs. Center your hold when you stop breathing. Hold as steady as you can and pull the trigger while you are holding steady.
Before live-fire in the sitting position, be sure to dry-fire several times and then shoot a group of five shots. Continue to shoot in this way, first dry-firing and then live-firing. Keep it up and you will develop excellent sitting position skills.
See more: How To Master The Kneeling Position
Most Popular